User manual for the ROC web application
Introduction
This ROC-E / ROC-M application manual describes all functions and how they work.
It covers use of the application on a ROC-E robot and on a ROC-M manager.
Home page
On a ROC-E robot
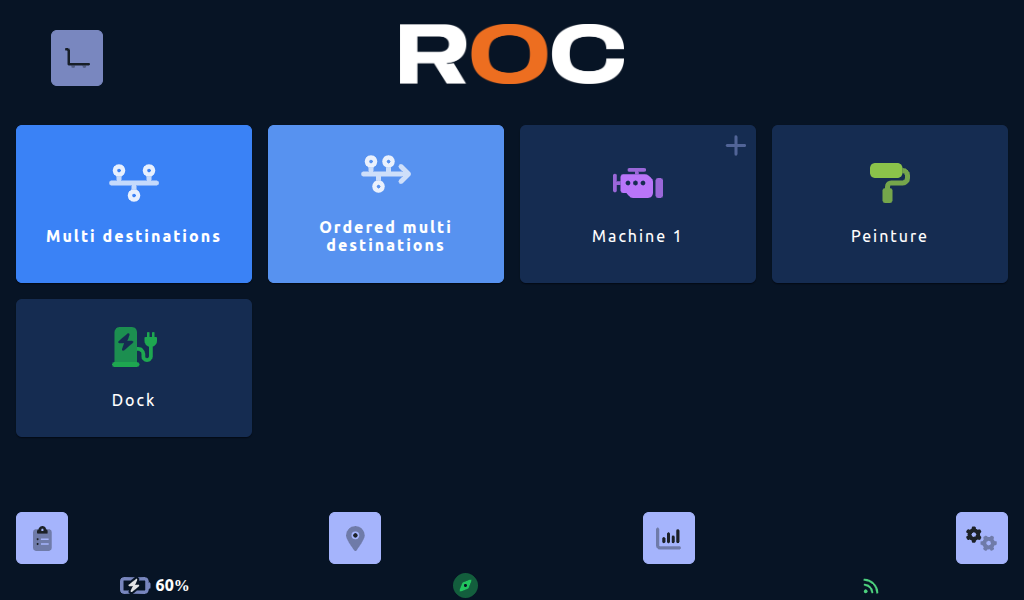
The home page displays the list of destinations stored in the robot's map in the form of a large button.
Pressing one of these buttons sends a command to the robot to move to the associated destination.
The button at bottom right gives access to the application configuration.
If the ROC-E is equipped with a Module Picker, a button will appear indicating whether the robot is loaded or not.
Multi destinations
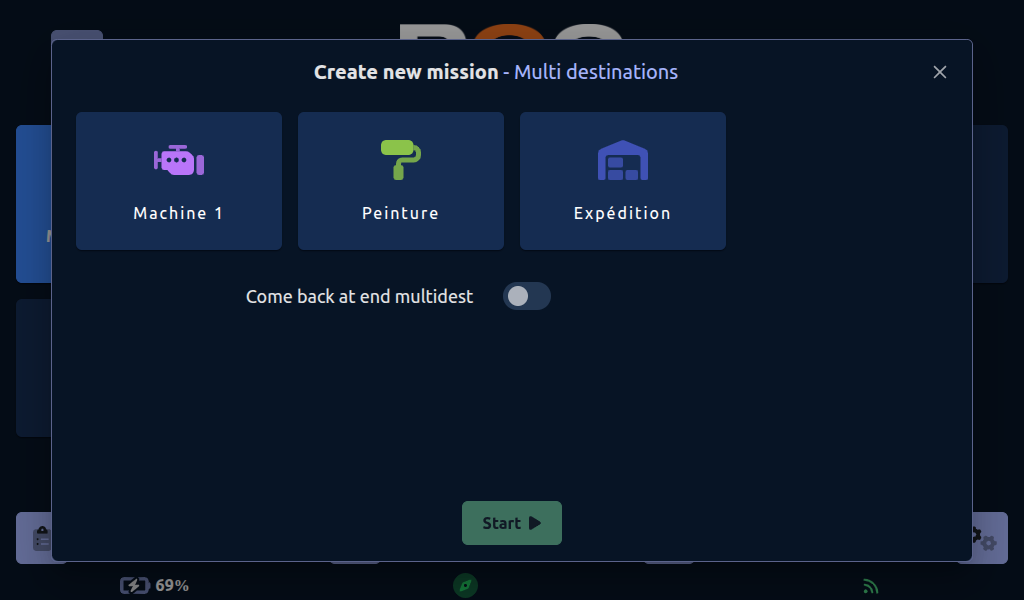
By clicking on the Multi destinations button, you can ask the robot to move to several positions in the same mission by selecting the desired destinations.
The robot will move from destination to destination, from closest to closest.
Once the robot has reached a destination, the operator can only release the robot to move on to its next destination (he cannot ask the robot to go to another destination).
Ordered multi destinations
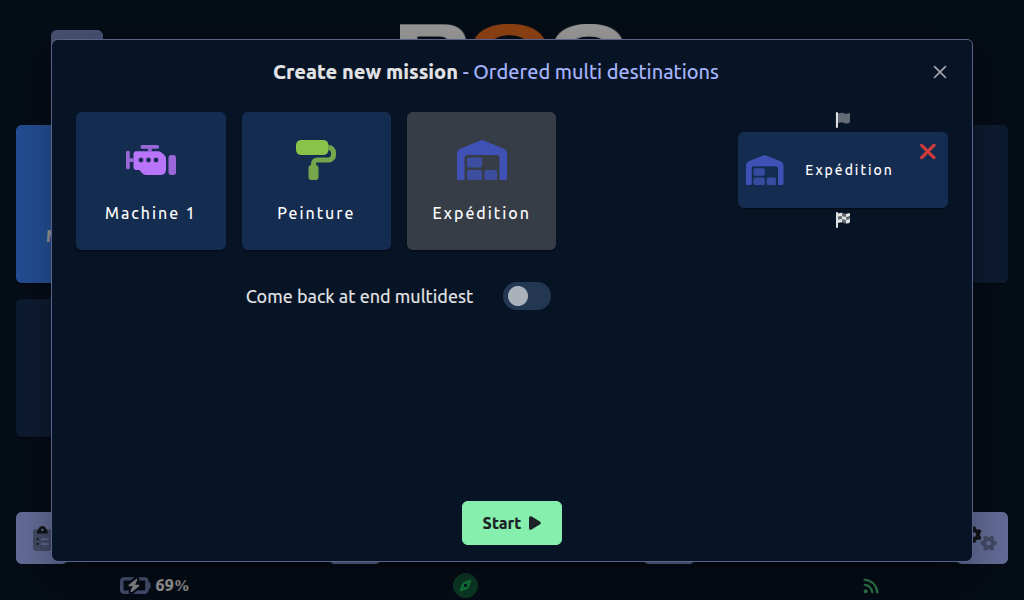
By clicking on the Ordered multi destinations button, you can instruct the robot to move to several positions in the same mission in a fixed order by selecting the desired destinations.
The robot will move from destination to destination in the desired order.
Once the robot has reached a destination, the operator can only release the robot to move on to its next destination (he cannot ask the robot to go to another destination).
Predefined messages
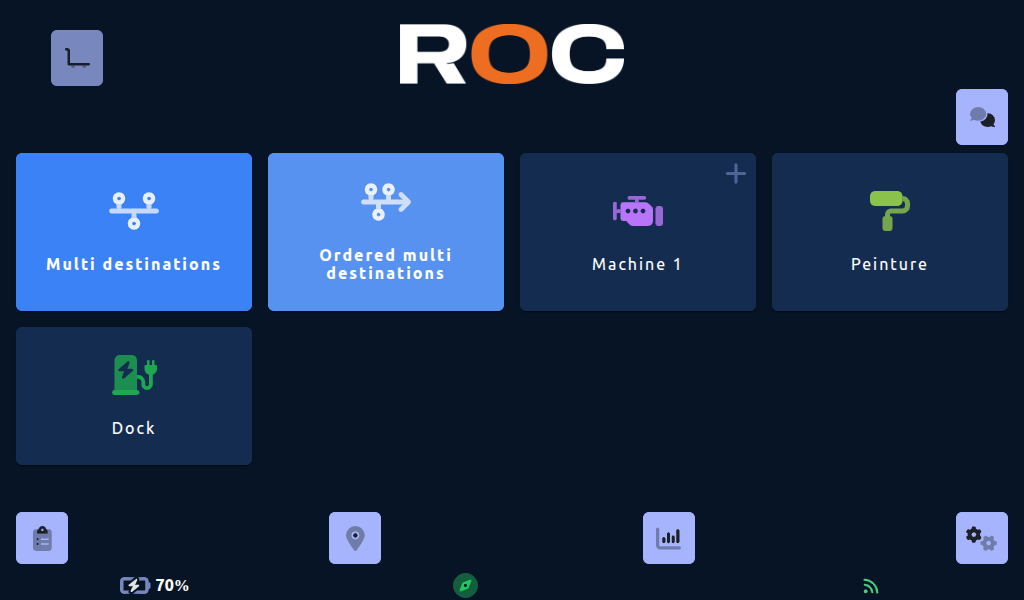
If predefined messages have been configured, a button with 2 bubbles appears at the top right.
This button is used to select a predefined message to be displayed once the robot has reached its destination for the current mission.
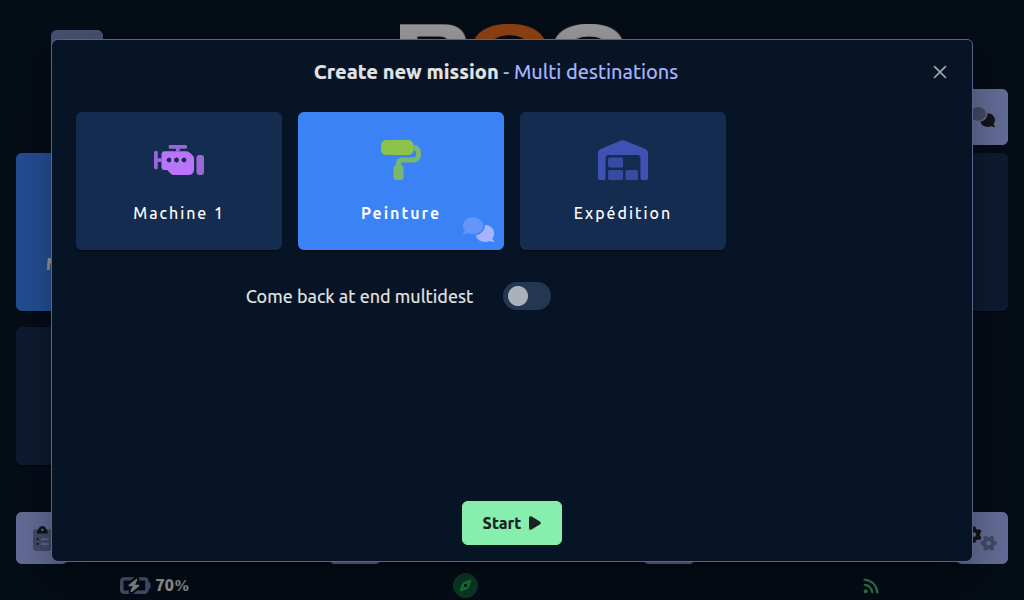
In the case of multi destinations, the message can be customised for each destination by clicking on the button associated with the destination.
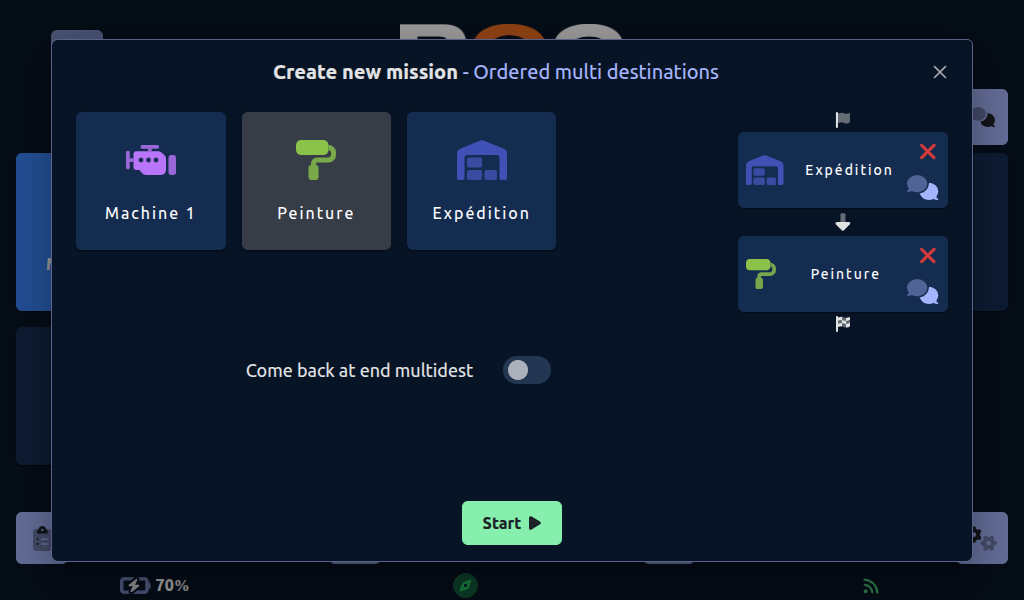
In the case of ordered multi destinations, the message can be customised for each destination by clicking on the button associated with the destination.
On a manager
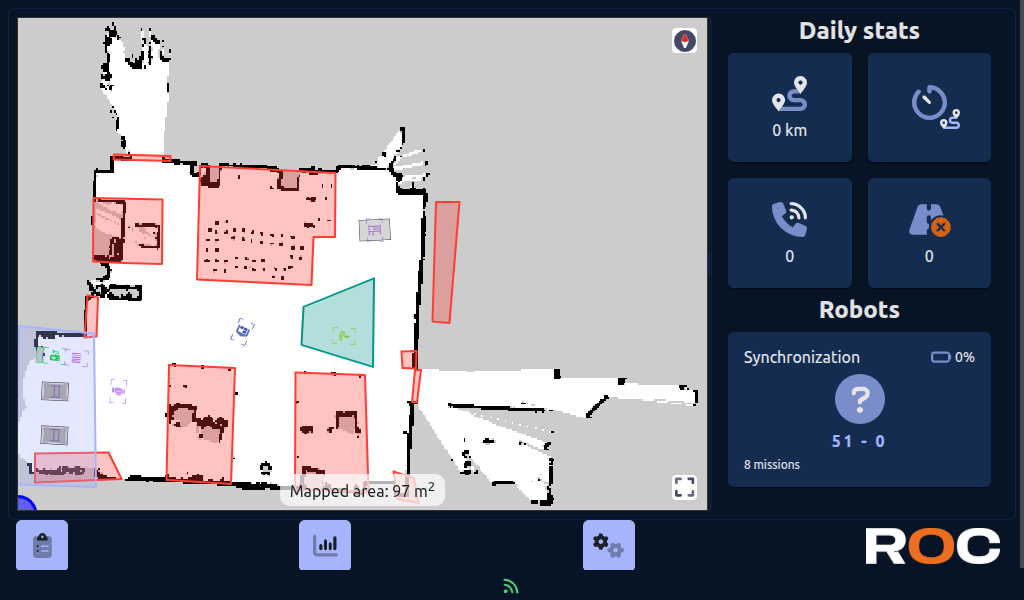
3 buttons at the bottom of the screen give access to different sections:
The button on the left gives access to the list of current missions.
The button on the right gives access to the application configuration.
The central button gives access to usage statistics.
For a vehicle that also acts as its own manager, these buttons are located next to the vehicle configuration button.
Configuration
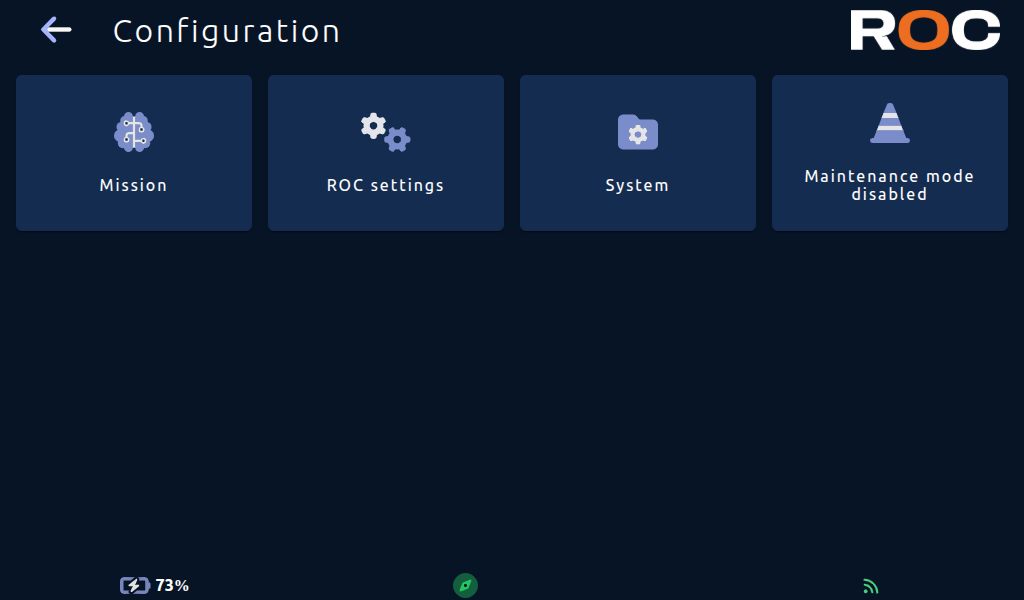
The configuration page allows you to configure the tool.
The robot's configurations are divided into four categories:
Mission: for configuring all elements related to the robot's mission, including:Buttons: add / modify / delete call buttons.Vehicles fleet: manage the list of fleet vehicles (available on an ROC-M manager or a vehicle that acts as a manager itself).Map: manage destinations, groups, and custom areas.Waiting poses: add / modify / delete waiting points.IoT Controllers: add / modify / delete IoT controllers.Custom commands: add / modify / delete custom commands.Predefined messages: add / modify / delete predefined messages.Operating Hours: To manage the robot's operating hours.
ROC Settings: The general configuration of the ROC-E is divided into:General: for vehicle/manager settings.Manager: for configuring the manager, delays, and settings.Vehicle: for vehicle configuration, number of attempts, and settings.Vehicle size: for configuring the module type and size/load parameters.Vehicle delays: for configuring the various delays.Lift: to interact with the ROC-P module lift (visible only if the module is configured, see Vehicle size).Advanced Configuration: to access the Noeme configuration application.
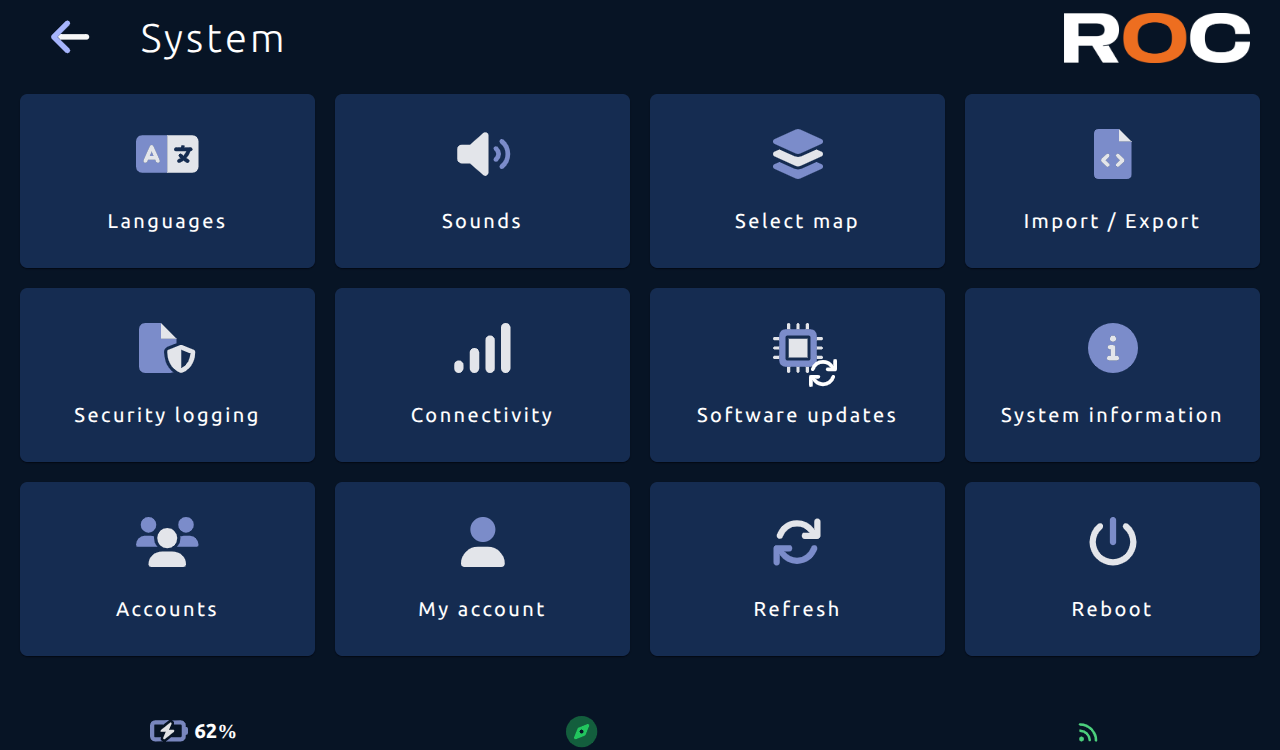
System: for general system configuration, it includes:Languages: select the interface language.Sounds volumes: configure different sound volumes.Select map: manage the active map.Import / Export: export / import configurations.Security logging: access / export security-related log entries.Connectivity: manage the different WiFi connections of ROC and Noeme.Software updates: manage updates for ROC-E and Noeme.System information: access system and security information for the ROC-E/ROC-M and Noeme.Accounts: add / modify / delete a user account.My Account: to change the password and PIN for the logged-in account.Refresh: update the page (perhaps useful when updating the application).Reboot: restart the ROC application.
Mission
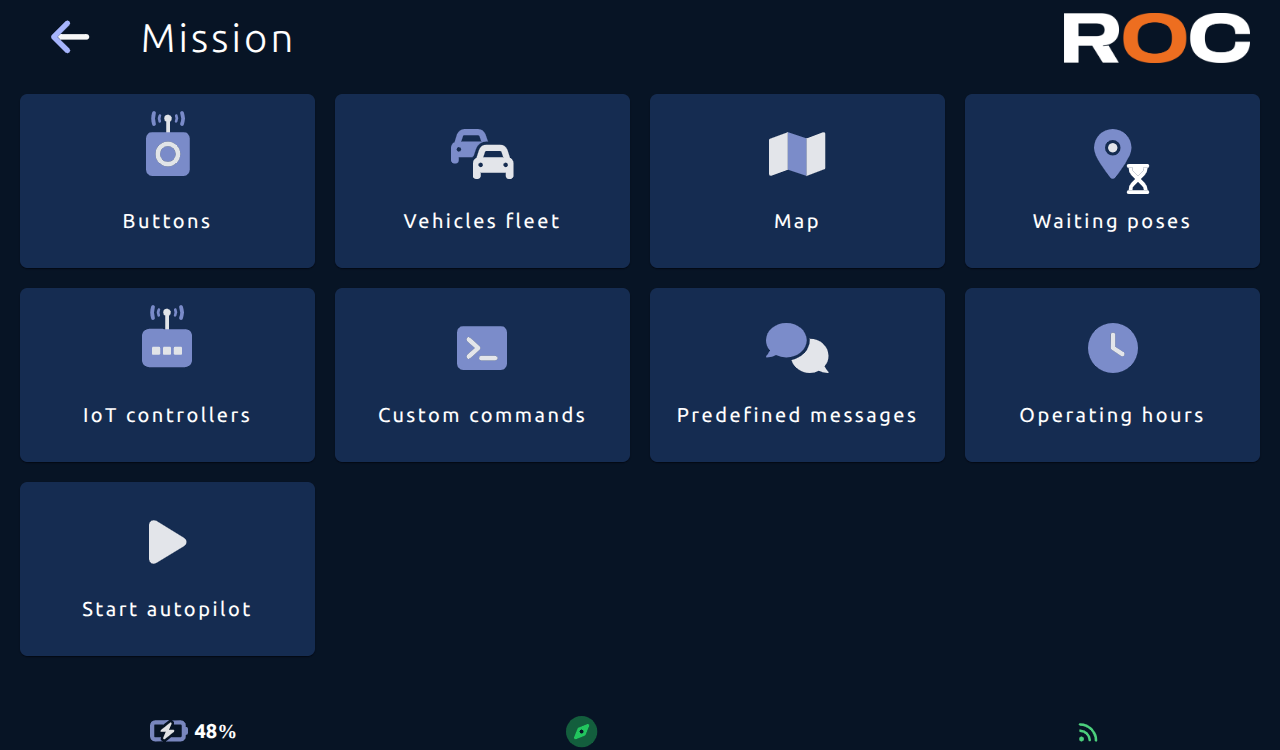
The Mission configuration page allows you to configure all elements related to the robot's mission.
Buttons
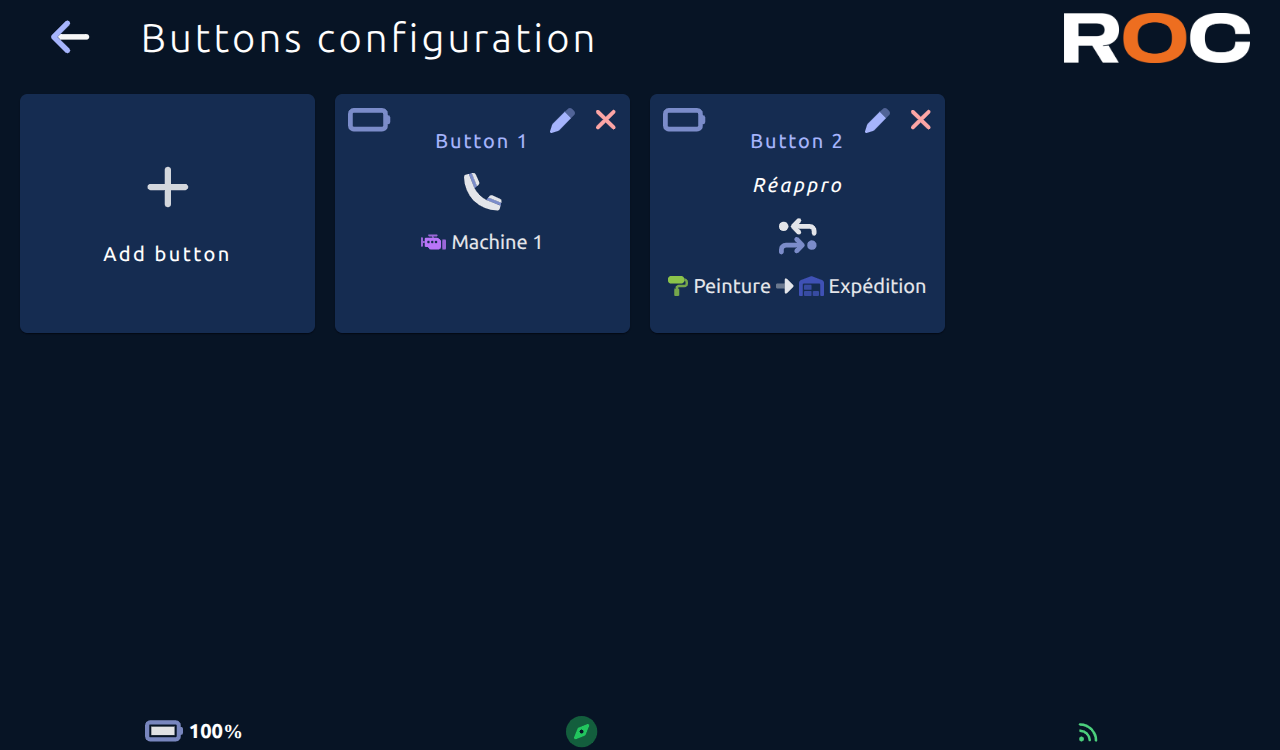
This page lists the configured buttons.
To add a new button, click on the "Add button" button.
To modify a new button, click on the pencil associated with the button.
To delete a button, click on the red cross associated with it.
Add a button
To add a new button configuration, click on the "Add button" button.
If the application is configured as manager and vehicle, an automatic mode will be proposed; otherwise, the manual mode will be displayed.
Follow the steps to create a new button.
Button type

The application currently supports 6 button types:
Call button: Once there, the user can choose the next step or release the robot..Restocking button: When the associated button is pressed, the robot will move to the first associated destination.Once there, the user can only release the robot, and it will move to the second associated destination.This type of configuration may be useful in the case of workstation replenishment, where the call is launched from the workstation, and the robot moves first to the warehouse where it will be loaded, and then to the user's workstation.Multidestination button: When the associated button is pressed, the robot will move to all associated destinations, from nearer to nearer.Multidestination and back button: When the associated button is pressed, the robot will move to all the associated destinations, from nearest to nearest, ending at a specific, configured last position.Ordered multidestination: When the associated button is pressed, the robot will move to all associated destinations in the defined order.Presence indicator: This type of button, associated with an unloading or picking station, will indicate to vehicles and the manager whether the station is full or free.
A button can be declared “virtual”; in this case, it will never be interrogated by the manager and can only be “called” via the modbus protocol or APIs.
Priority
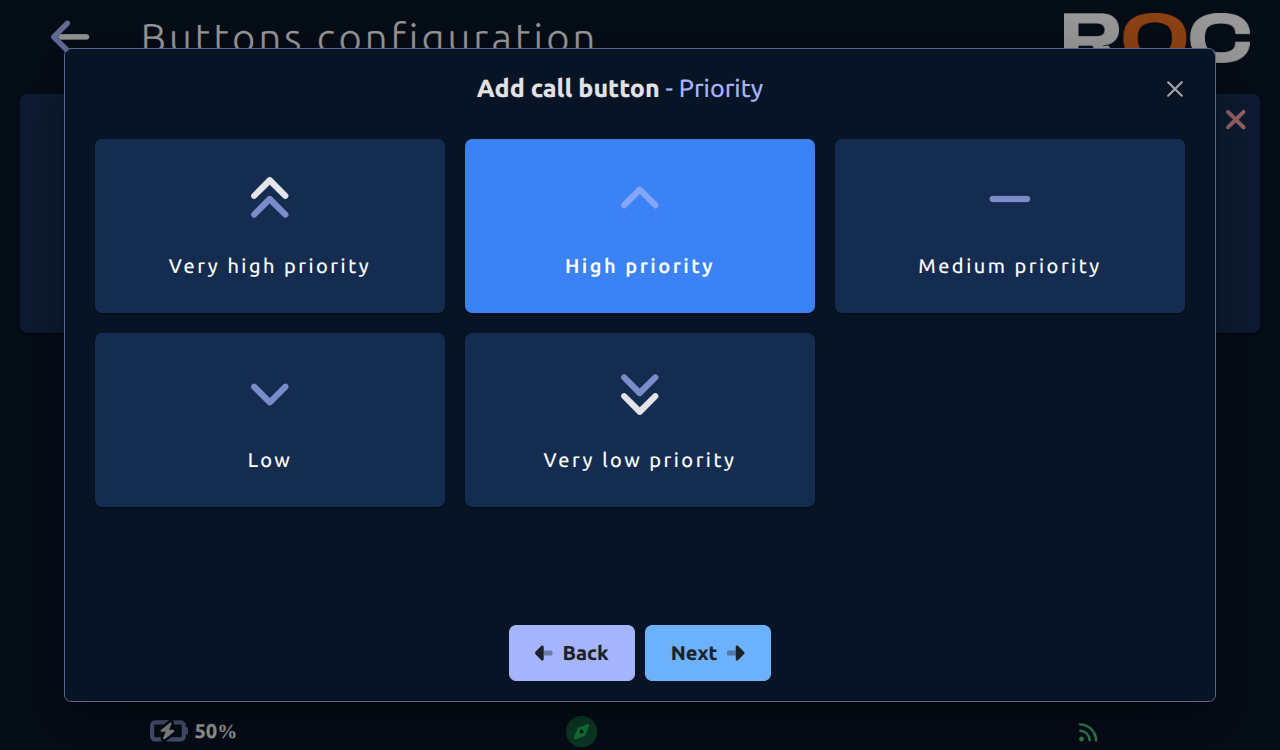
The button's priority setting allows the manager to schedule tasks according to that priority.
Constraints
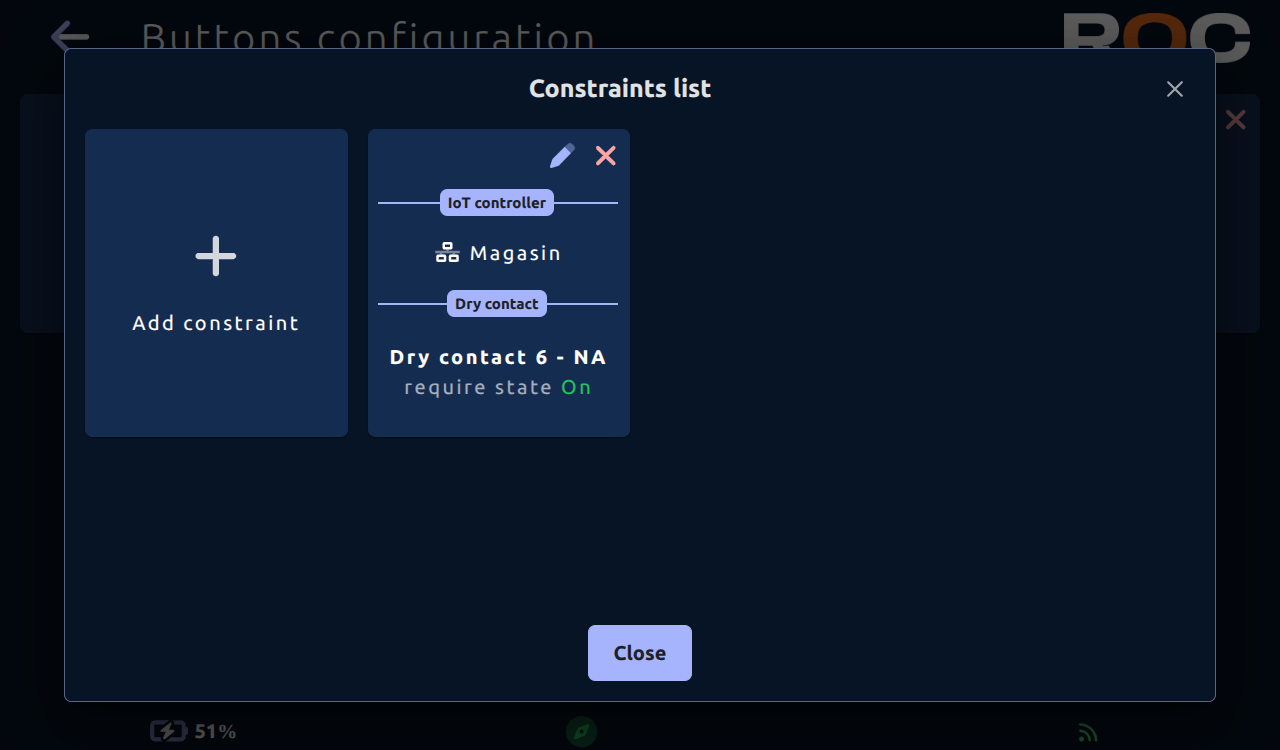
For each step, you can set constraints by clicking on the padlock associated with the step.
These constraints are linked to the IoT controllers connected to the solution (see section on IoT controllers);
To define a constraint, you must indicate:
the IoT controller where the sensor that will define the constraint is connected
the IoT controller contact
the state of the contact expected to validate the step
Module type
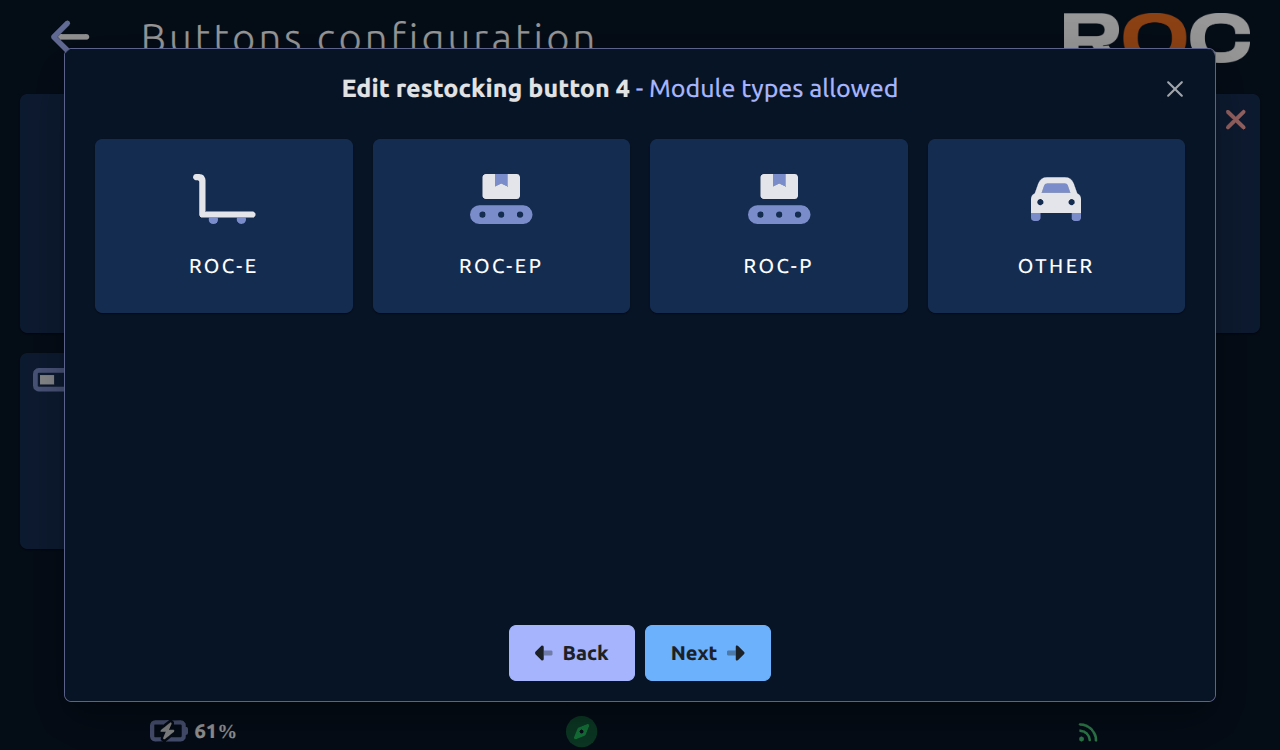
When creating or modifying a button, you can restrict which ROC module types can be called by that button. Select the module(s) authorized to respond to a call from that button (selecting none type means that all types will be allowed).
Vehicles
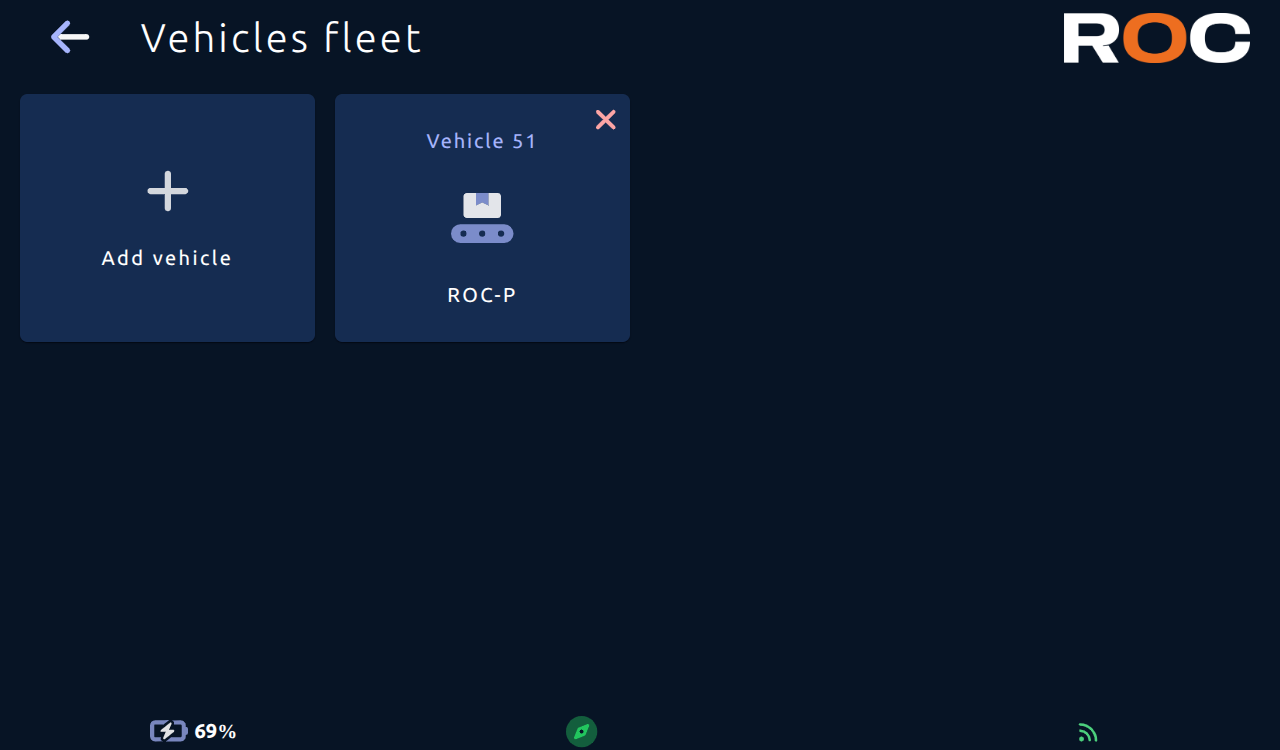
This page lists configured vehicles.
To delete a vehicle, click on the red cross associated with the vehicle.
To add a new vehicle, click on the "Add a vehicle" button and complete the required information.
Map
This section allows you to:
add, move and delete saved poses.
add or remove docked poses (picking or not).
add or remove shelf poses.
add, modify or remove custom areas.
modify names, icons and colors of saved poses, charging stations and docked poses.
configure control of a IoT controller relay when the robot is in position.
restrict access to positions to certain module types.
manage groups.
Add a location
To add a location to the map, click on the “+” button.
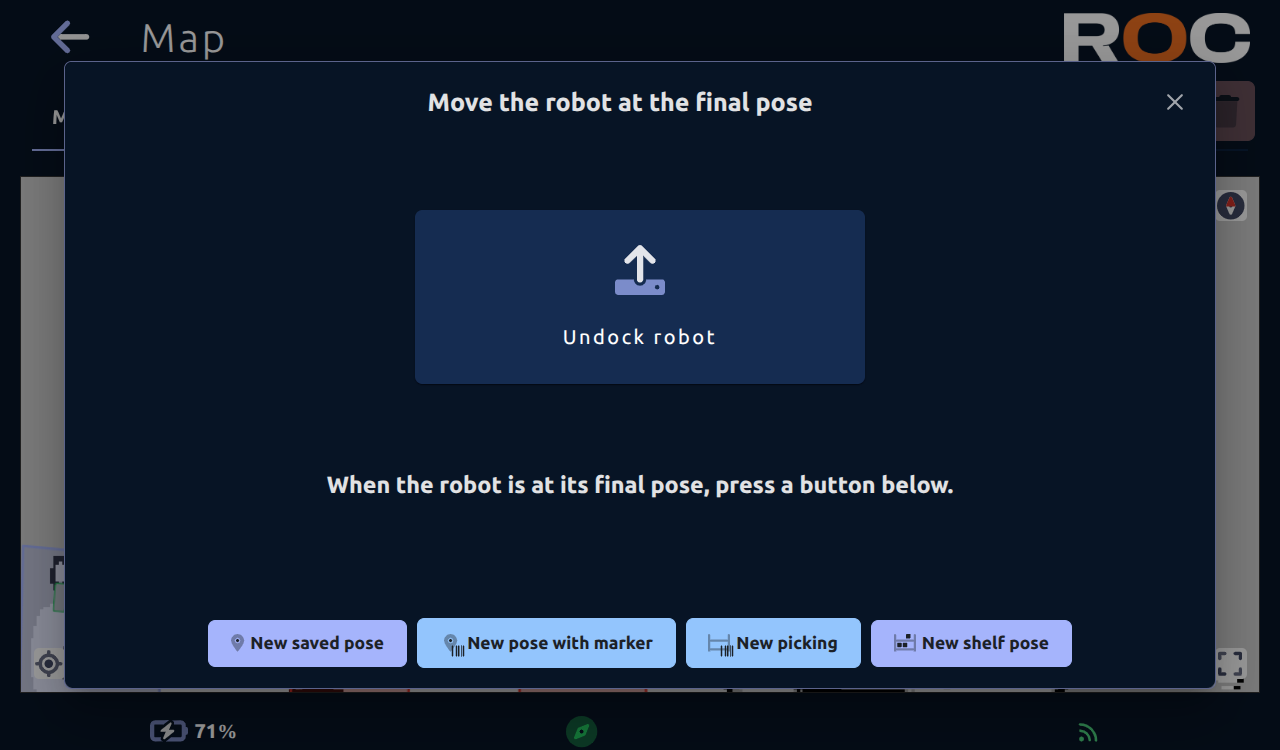
Depending on whether or not the ROC-P module is present, you can create four types of positions:
a saved pose
a docked pose
a docked pose for a picking station, this will create a docked pose with its parameters preconfigured for a picking station
a shelf pose
Saved pose
This type of position corresponds to a classic position; the robot will move to this position with an authorized margin of several centimeters.
Docked pose
This type of position corresponds to a precise position; the robot will move to this position with a margin of error of less than one centimeter.
This type of position requires a marker so that the robot can position itself precisely.
In the case of the ROC-P, this type of position is required for picking stations or shelf placement positions.
Shelf pose
In the case of the ROC-P, you must create this type of position at the location where you want a shelf to be picked up.
Modify a position
Depending on the type of position, several options can be modified.
Regardless of the type, you can modify the following options:
Name: name of the position.Color: icon color.Icon: icon associated with the position.Automatic shelf unloading: This option allows the robot if equipped with a Picker module to automatically unload its shelf once it reaches this position.Sound waiting release: The sound and volume played by the robot while it waits at this position.Activate a relay on the position: this option allows you to activate a relay on a IoT controller when the robot is in this position.
To activate a relay, select:the controller.
relay 1 or 2.
The action on the relay (On/Off - to activate the relay when the robot is present, Pulse to send a pulse to the relay when the robot arrives).
Docked pose
In the case of the ROC-P, you can indicate the type of station present at this position:
None: no station present, use this configuration for shelf placement.Loading: for gravity loading stations.Unloading: for gravity unloading stations.Picking: for picking stations.
In the case of stations, you can indicate whether or not there is crate detection by completing the contact section.
You must indicate the dimensions of the loads that will be picked up at these stations as well as the height to which the elevator must be raised to pick up the load.
Shelf pose
In the case of the ROC-P and a shelf pose, you must specify the dimensions of the shelf that will be picked up at this position, as well as the height to which the lift must be raised to pick up the load (maximum height; the lift will stop automatically when it detects contact).
Docked or shelf pose
A set of advanced parameters allows you to configure the robot's approach to these positions:
Undock distance: distance the robot must travel to exit this position.Approach distance: distance at which the robot positions itself before starting the docking phase.Disable safety distance: distance at which the robot deactivates its safety features to allow it to approach obstacles in the final position.Guided distance: distance during which the robot can no longer turn before reaching the final position.Max speed: maximum speed allowed during the docking phase.Contact allowed: allows or disallows the robot to touch and push against an obstacle.Contact success tolerance: tolerance in mm for considering the robot's position relative to the final position as a successMotors amps threshold: maximum motor amperage threshold allowed during the docking phase.Motors amps timer threshold: maximum duration allowed to exceed the maximum amperage threshold.
Groups
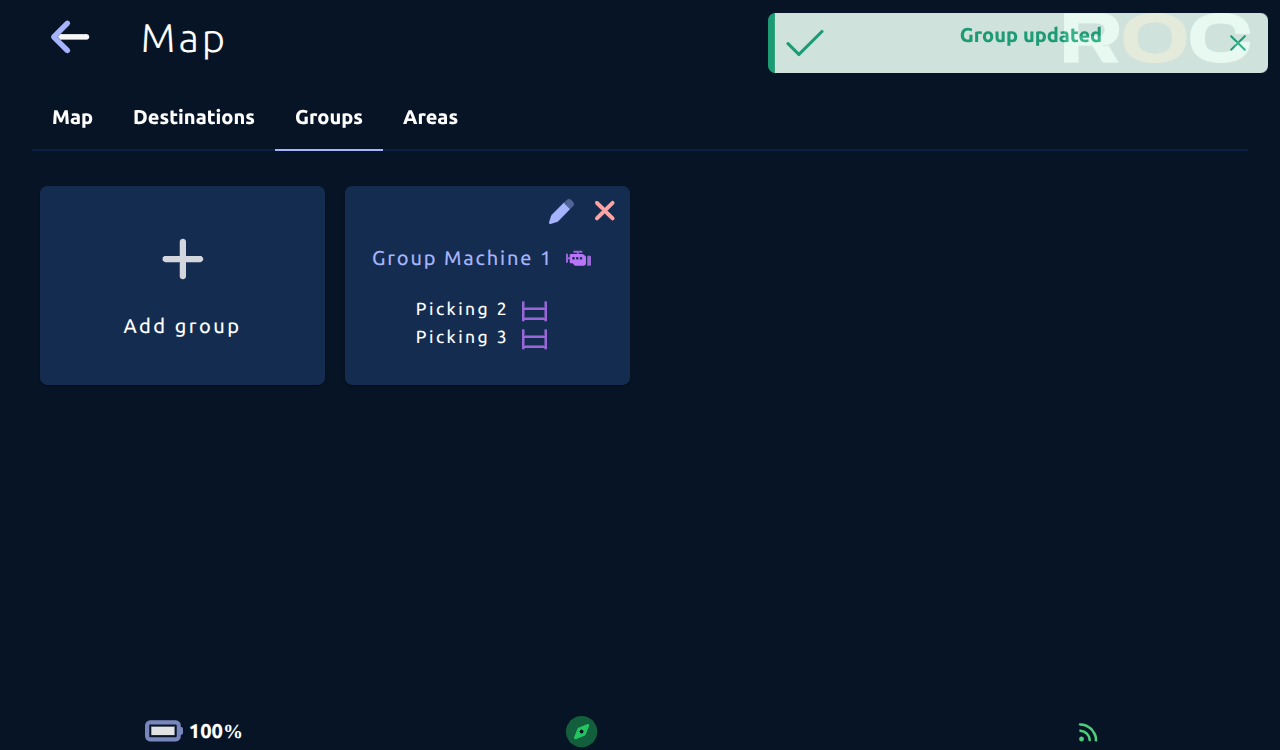
You have the option of creating position groups. A group consists of a main position and several secondary positions.
When a mission is configured to move to a main position in a group, the screen will automatically display the list of secondary positions when the robot arrives at that destination. The user can then ask the robot to move to one of the secondary positions to “complete” the route.
If the vehicle is equipped with a Picker module, grouping picking station positions will allow the vehicle to drop off its load at any available station within the group.
The vehicle will attempt the first position in the group, then the second if the first is not available, and so on. This retry behavior can be optimized by using stations equipped with buttons configured for Presence indicator (see Buttons) to avoid attempting to drop off at a full station.
The same principle applies if the group is used for picking up a load; the robot will attempt to pick up the load at the first station; if that station is empty, it will move on to the next one.
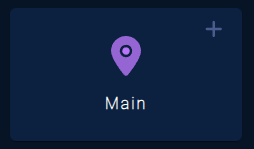
On the home page, the secondary positions of the groups will be hidden and a “+” icon will be added to the main positions of the groups. By clicking on this “+”, you will then be able to access the list of secondary positions for the group.
Areas
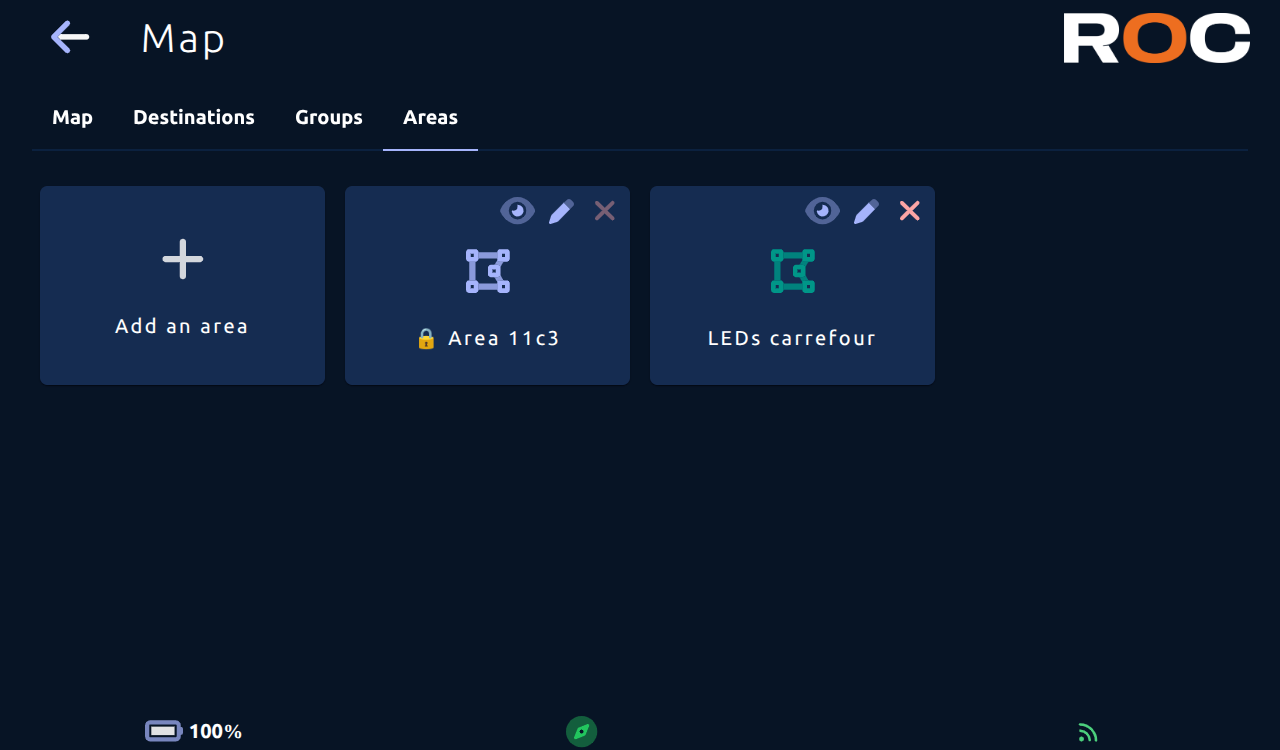
You can create areas on the map. This allows you to configure specific behaviors for the robot, such as speed and sounds or LED effects that are triggered when the robot enters, exits, or is within that area. You can also associate a safe position with an area; if an alarm is triggered via an IoT controller and the robot is in that zone, it will automatically move to the associated position.
Waiting points
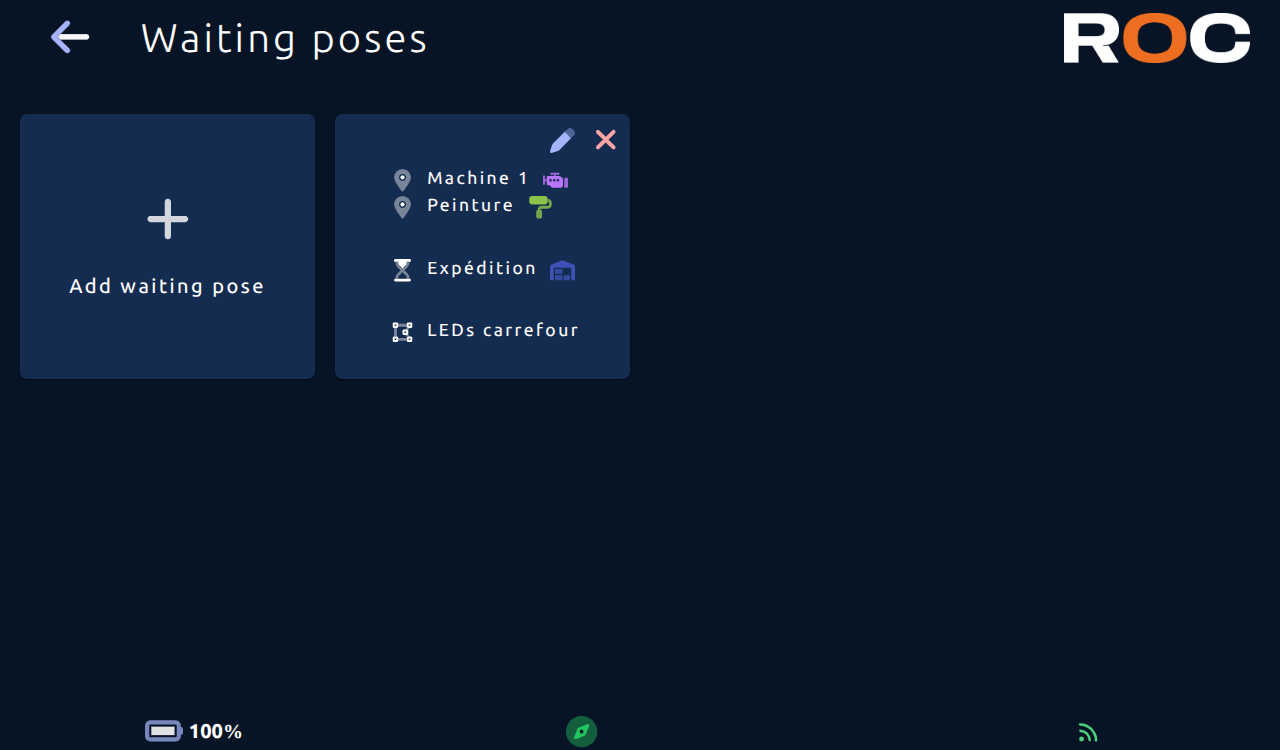
In some cases, several robots will need to go to the same saved pose at the same time.
To prevent robots from self-blocking, it is possible to set up waiting points so that one of the robots waits on the position until the other robot has left the saved pose.
Prerequisites
To add a new waiting point, you must first create:
The saved pose(s)where there may be a conflict. (indicated by the map marker icon)The saved pose corresponds to the
waiting point. (indicated by the hourglass icon)A custom areamust contain the saved pose where there may be a conflict.The robot will send a message to the other robots to indicate that the space is free when it leaves this area.
IoT controllers
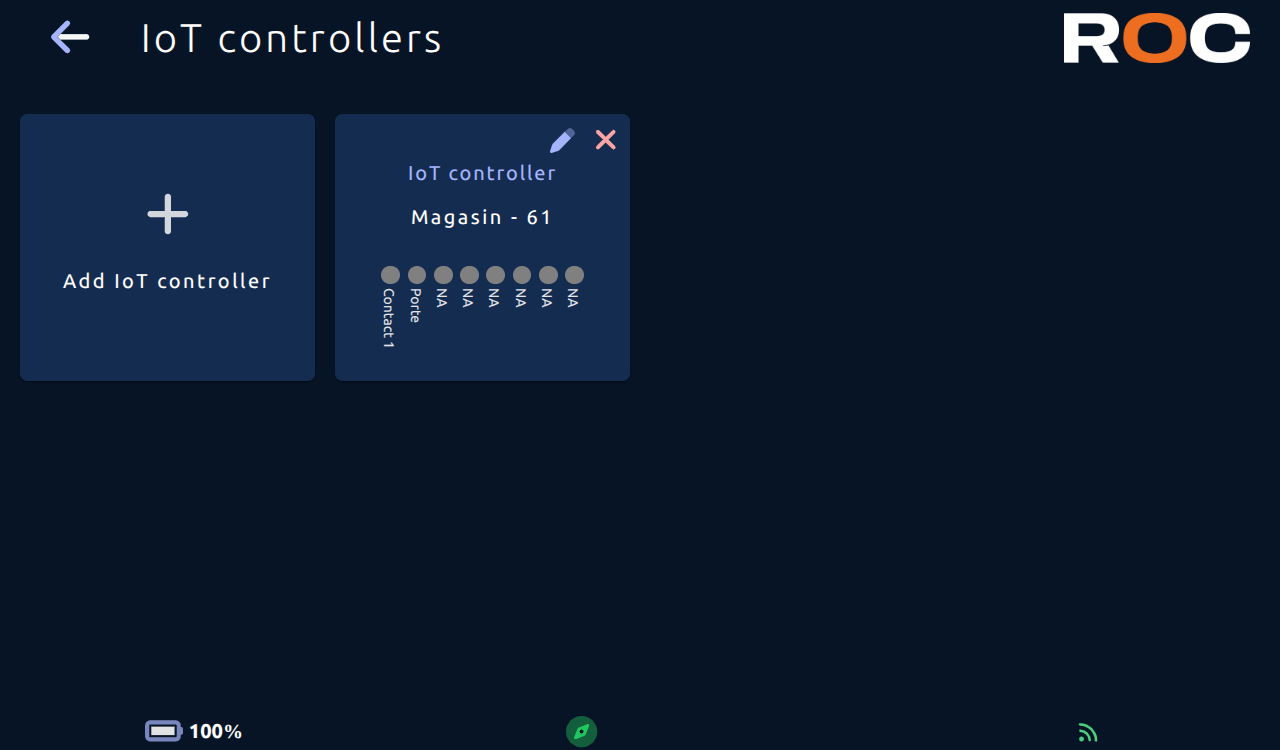
This section lets you add, modify and delete IoT controllers for use in other configurations.
When a controller contact is active, the dot will be green.
When modifying a IoT controller, it is possible to remotely retrieve the configuration of the controller's contacts. Once this configuration has been retrieved, you can modify the configuration of a contact remotely.
Custom commands
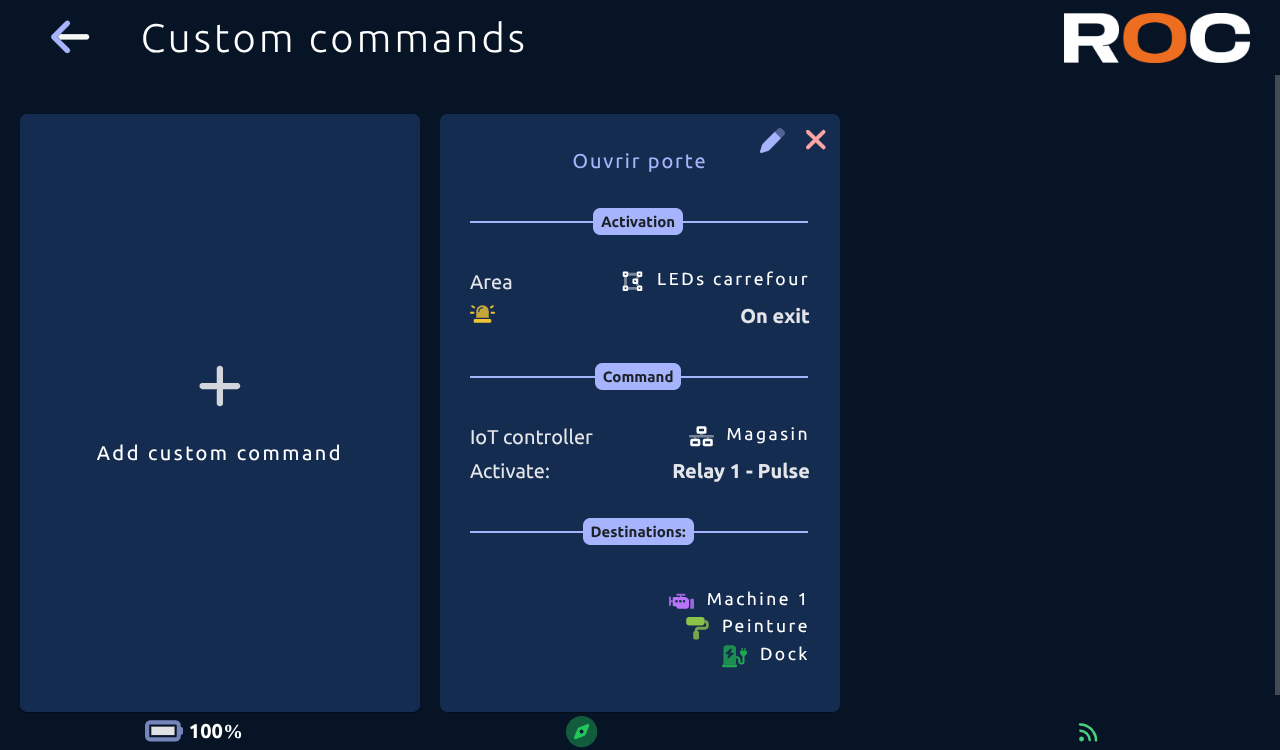
Custom commands can be created to instruct a IoT controller to activate one of its relays at a particular time, or to pause robot movement depending on the state of a IoT controller contact.
To add a custom order, you must indicate:
a
titlethe
trigger zone(create a customizable zone on the map as a first step)the
list of saved posesfor which the order is to be sent (select nothing to apply to all destinations, activate “All except” to select only those positions where the behavior should not be triggered)the
triggering moment(on entering the zone, on leaving the zone, on a movement error, as long as the robot is in the zone)the
IoT controller relayto activate or the contact to wait for
Examples of use: open an automatic door, switch off a zone alarm system, wait for a door to open before continuing...
Predefined messages
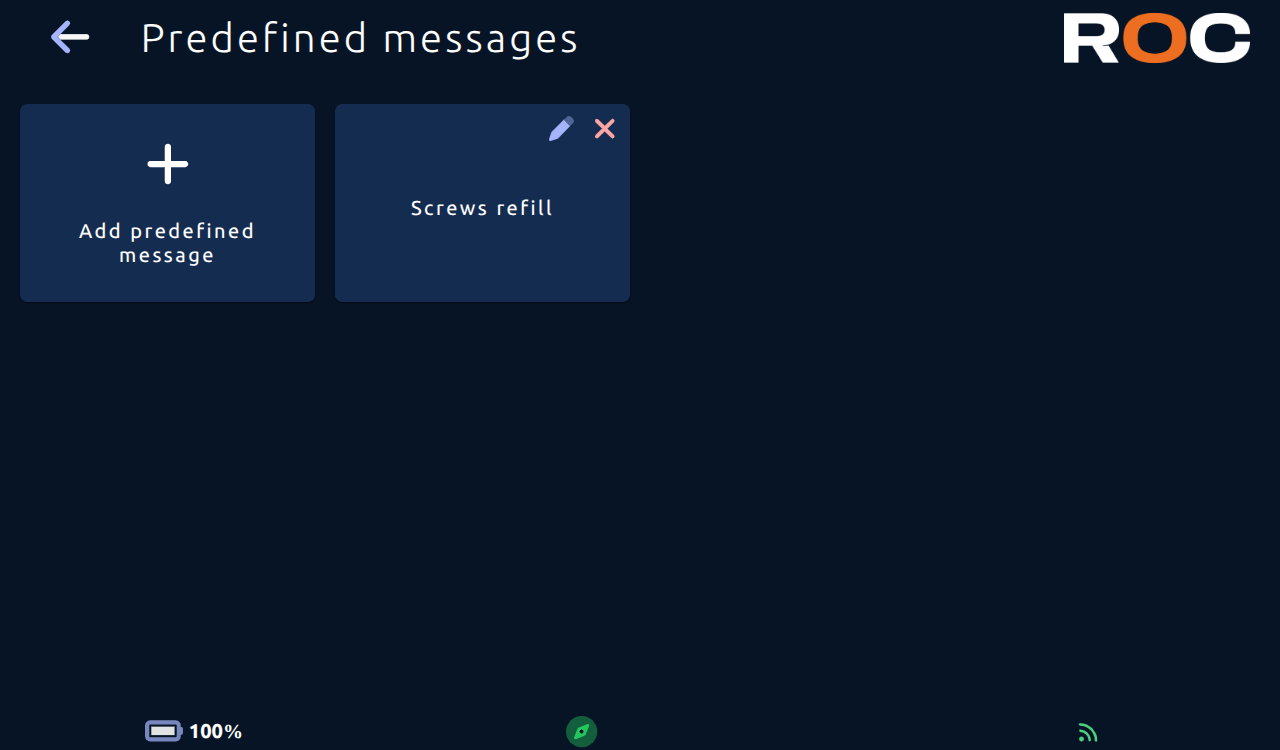
This section allows you to add, modify and delete predefined messages to display on robot when it moves.
Operating hours
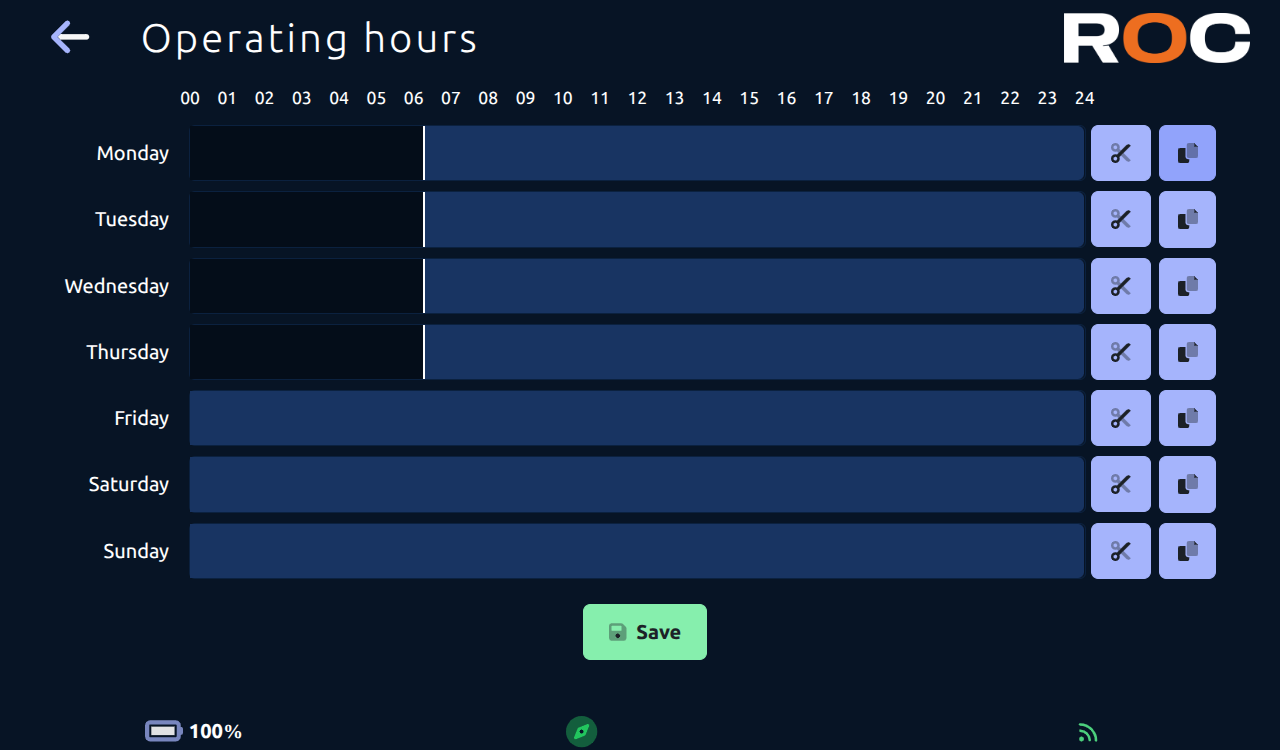
This section allows you to manage the robot's operating hours by day of the week. The scissors button lets you divide the day into segments during which the robot is either working or not working. Once a day has been properly configured, you can duplicate it for the other days of the week using the paste button.
ROC Settings
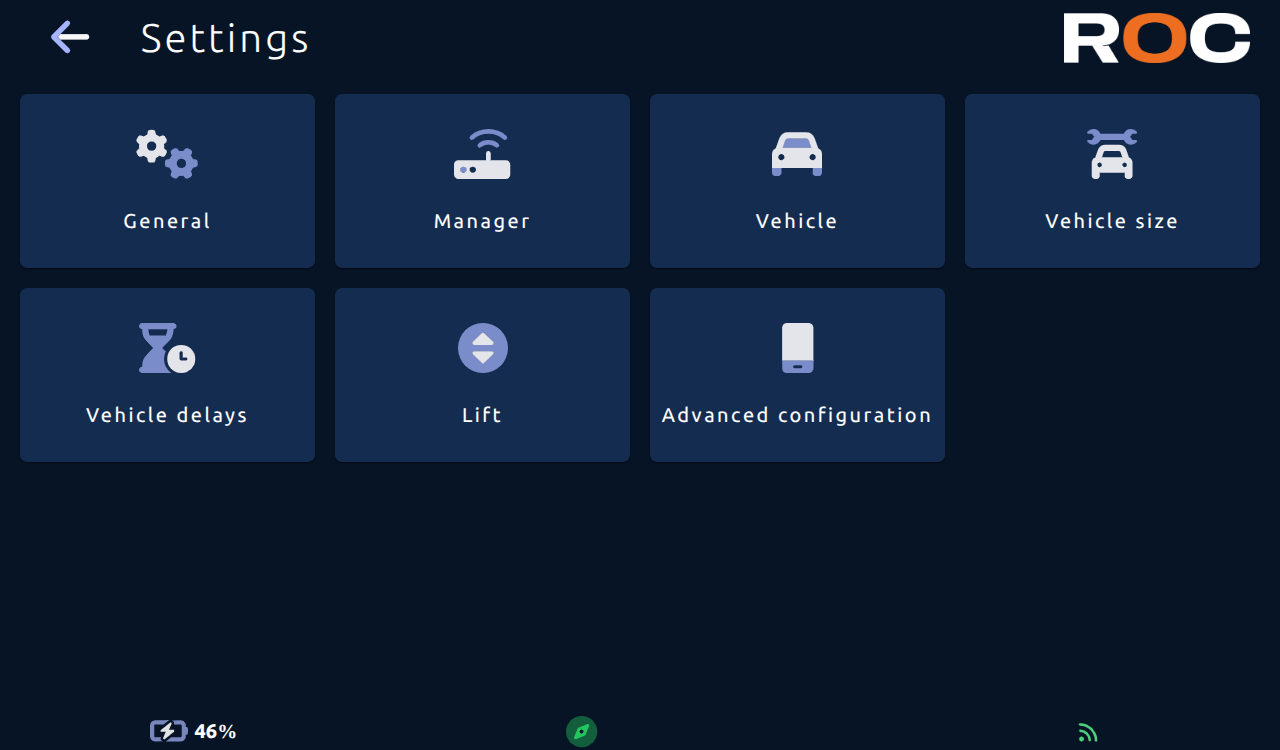
This configuration page lets you access certain information (application version, ROC Id...) and configure various application parameters of ROC-E/ROC-M.
General
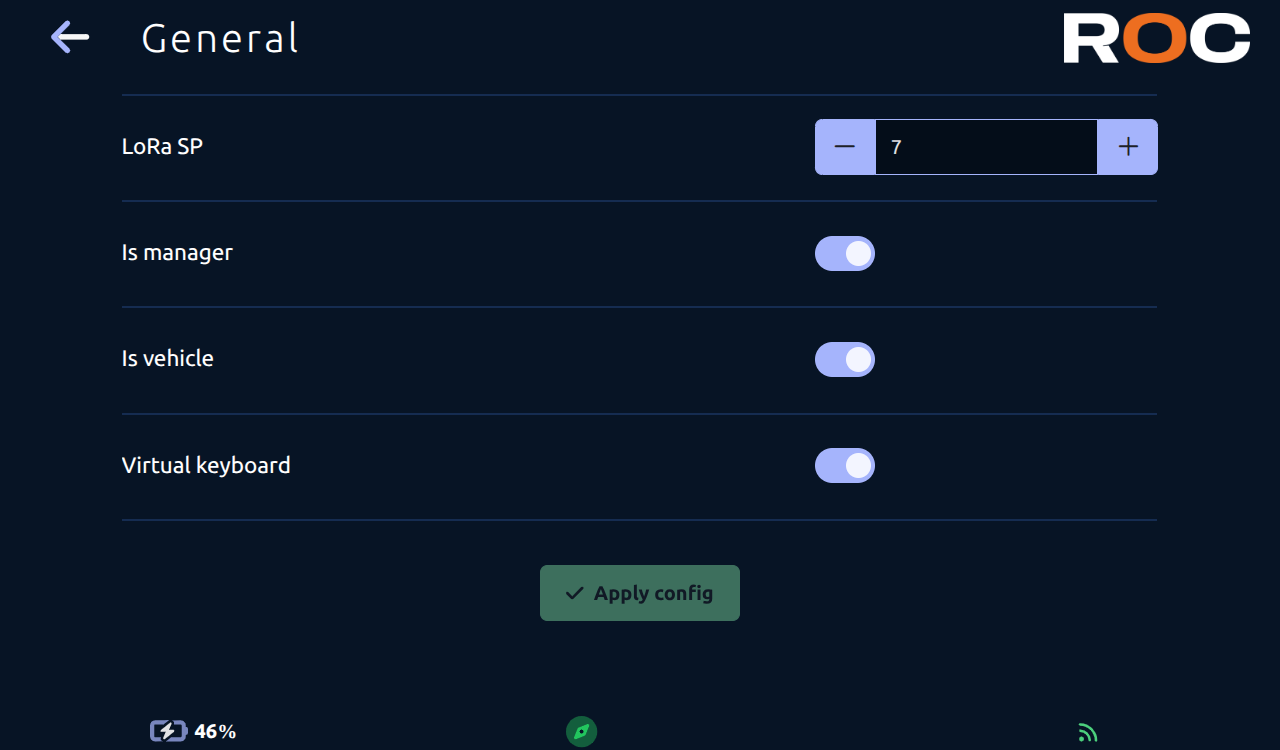
This page allows you to view/modify the following parameters:
LoRa SP: configuration of LoRa communication spread factor; must be the same as call buttons, manager and other robots. Possible values from 7 to 12.
The higher the value, the slower the communication but the longer the range.Is manager: indicate whether the active equipment is the manager or not.Is vehicle: indicate whether the active equipment is connected to a Noeme vehicle.Virtual keyboard: Whether or not to use the virtual keyboard.
Manager
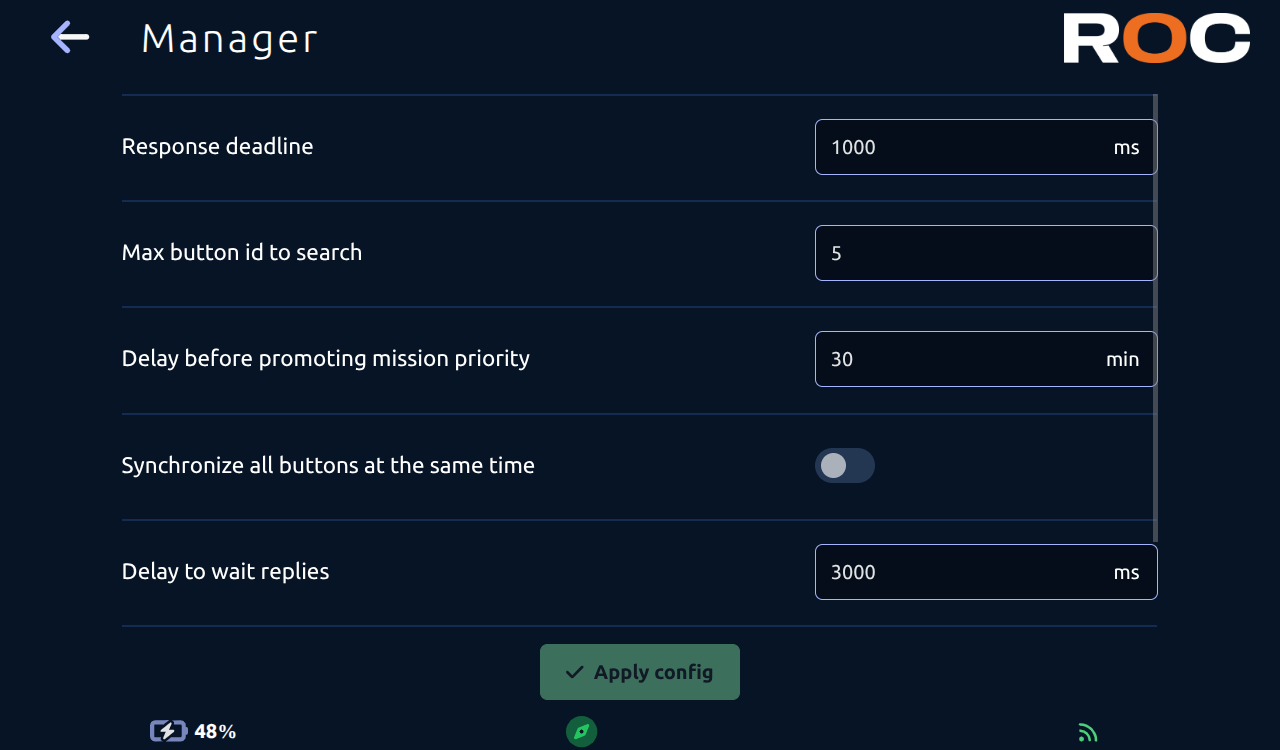
This page allows you to view/modify the following parameters:
If the manager is also a vehicle:
Response deadline: waiting times for call equipments responses.
If the manager is not also a vehicle :
Default response deadline: default waiting times for call button and IoT controller responses.Vehicle response deadline: waiting times for vehicle responses.Max button ID to search: The maximum LoRa ID searched for by the manager for button auto-configuration.Delay before promoting mission priority: The delay before a mission is promoted to a higher priority.Synchronize all buttons at the same time: Simultaneous synchronization of all buttons.Delay to wait replies: Delay maximum for receiving responses from buttons.Allow multiple missions for the same button: Allow the creation of multiple missions for the same button via the APIs or Modbus.
Vehicle
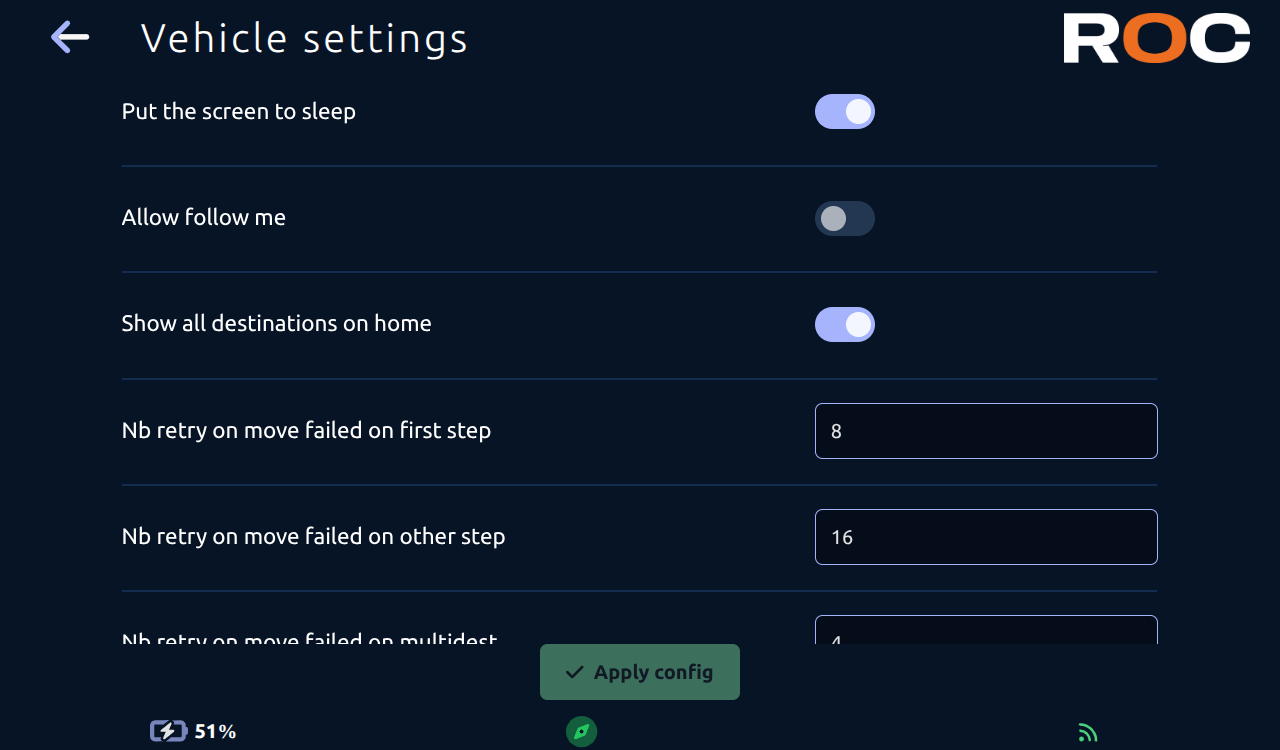
This page allows you to view/modify the following parameters:
Allow move from dock: allow a user to start a new mission when the robot is waiting at its charging station.Mast position: to indicate the position of the mast on the robot; indicateFrontif the mast is on the side of the vehicle's white lights,Backotherwise..Direction to the charging station: to indicate which way the vehicle should connect to the charging station; indicateFrontfor the vehicle to connect on the side of the vehicle's white lights,Backotherwise.LoRa module ID: LoRa module identifier for communication. Must be unique and reported on the manager.Put the screen to sleep: Put the screen to sleep when robot enter in sleep mode.Allow follow me: Allow follow me when the robot is stopped.Show all destinations on home: Display all destinations on home or a button "All destinations".Nb retry on move failed on first step: number of move attempts if move fails at first stage.Nb retry on move failed on other step: number of move attempts if move fails at other stages.Nb retry on move failed on multidest: number of retry attempts in the event of a failed multidestination trip.Veh to destination, distance goal tolerance: distance in cm around the destination where the robot is considered to have arrived.Veh to destination, yaw goal tolerance: angle in degrees with respect to the destination where the robot is considered to have arrived.
Vehicle size
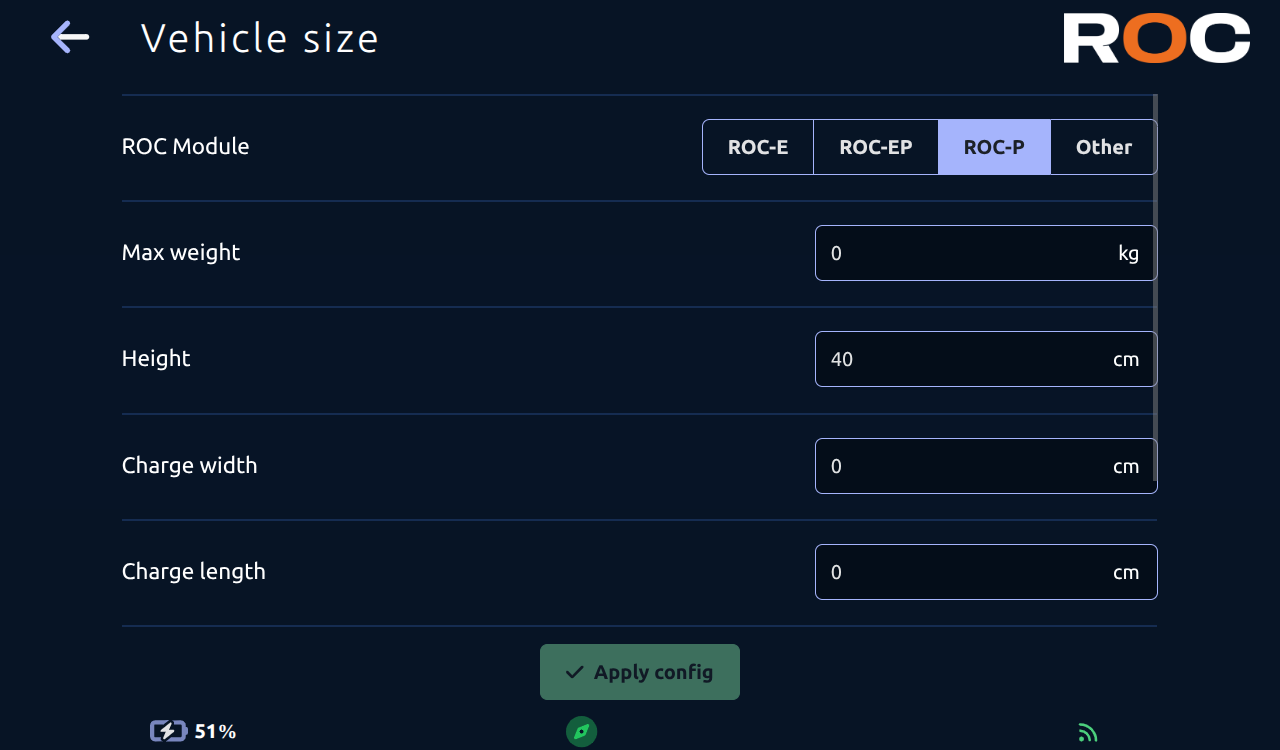
This page allows you to view/modify the following parameters:
ROC Module: type of active ROC module.Max weight: maximum weight of the robot with its load.Height: total height of the robot.
If the module is of type ROC-EP or ROC-P
Charge width: width of the load being transported.Charge depth: depth of the load being transported.Height with charge: total height of the robot with its load.Charge max speed: maximum speed of the robot authorised when carrying the load.
If the module is of type Other
Max width: maximum width of the robot.Max depth: maximum depth of the robot.
Vehicle delays
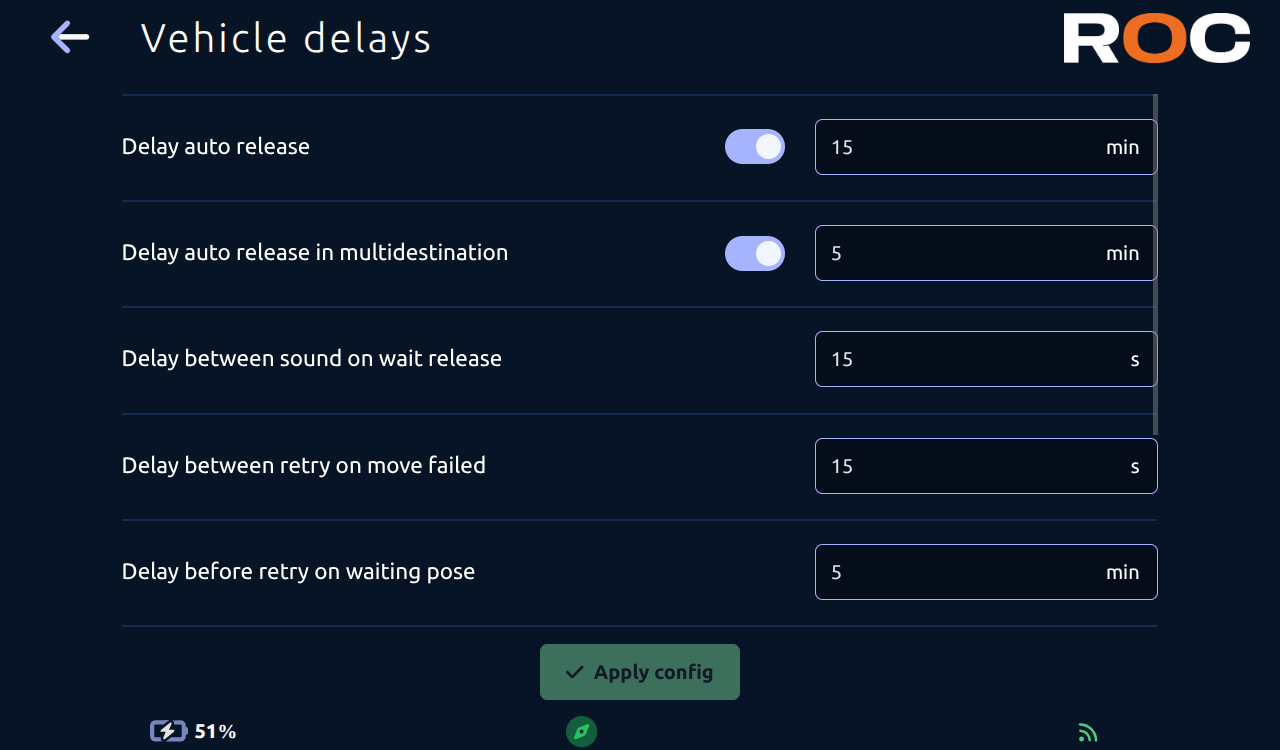
This page allows you to view/modify the following parameters:
Delay auto release: automatic release delay on arrival at first stage (robot without load).Delay auto release in multidestination: automatic release delay on arrival at other stages (robot potentially loaded).Delay between sound on wait release: delay between 2 tones to indicate waiting for release.Delay between retry on move failed: waiting time between 2 attempts if the move fails.Delay before retry on waiting pose: waiting time before retry when the robot is in a waiting position.Delay before standby: waiting times once the robot is charging and before it goes into standby.Delay between 2 attempts when paused: waiting time before automatically resuming a paused move.Lift - Delay in continuing to ascend after contact: the elevator will continue to ascend after detecting contact for the defined delay. Used for attaching to shelves, this setting is only visible for ROC-P or ROC-EP type tops.
Some delays can be activated/deactivated with a switch.
When the delay is disabled, the functionality is deactivated, for example: if the switch for delay before standby is disabled, the vehicle will never go to standby.
Lift
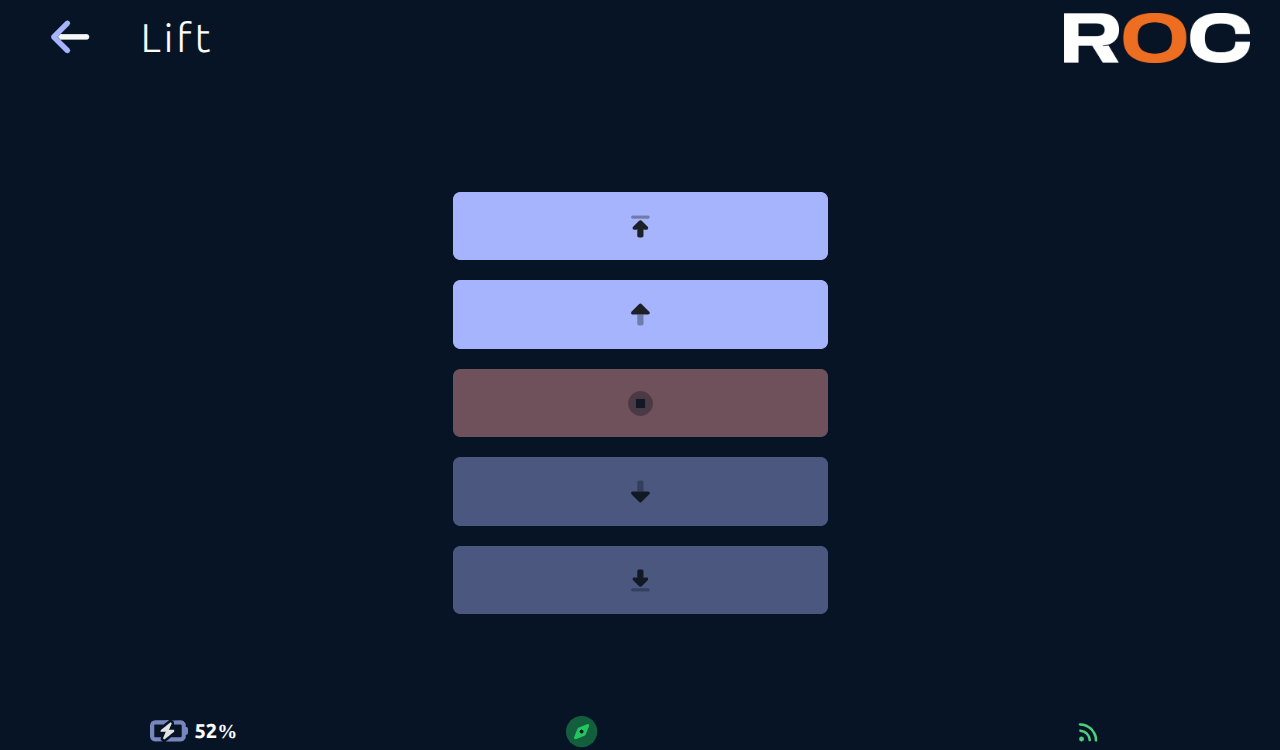
This section allows you to interact with the ROC-P module lift.
The top button allows you to raise the lift to its maximum height.
The second button allows you to raise the lift as long as the button is held down.
The penultimate button allows you to lower the lift as long as the button is held down.
The bottom button allows you to lower the lift to its lowest position.
When the lift is moving, the red button allows you to stop its movement.
The button with the cogwheel allows you to configure the height of the top of the lift relative to the ground. To change the configuration, click on the button and enter the actual height of the top of the lift relative to the ground in the input field. This configuration allows the vehicle to check for obstacles before lowering its load.
Advanced configuration
This menu gives you direct access to the Noeme vehicle's application.
Please refer to the Noeme application documentation for further details.
System

The System configuration page allows you to access and configure general system settings.
Languages
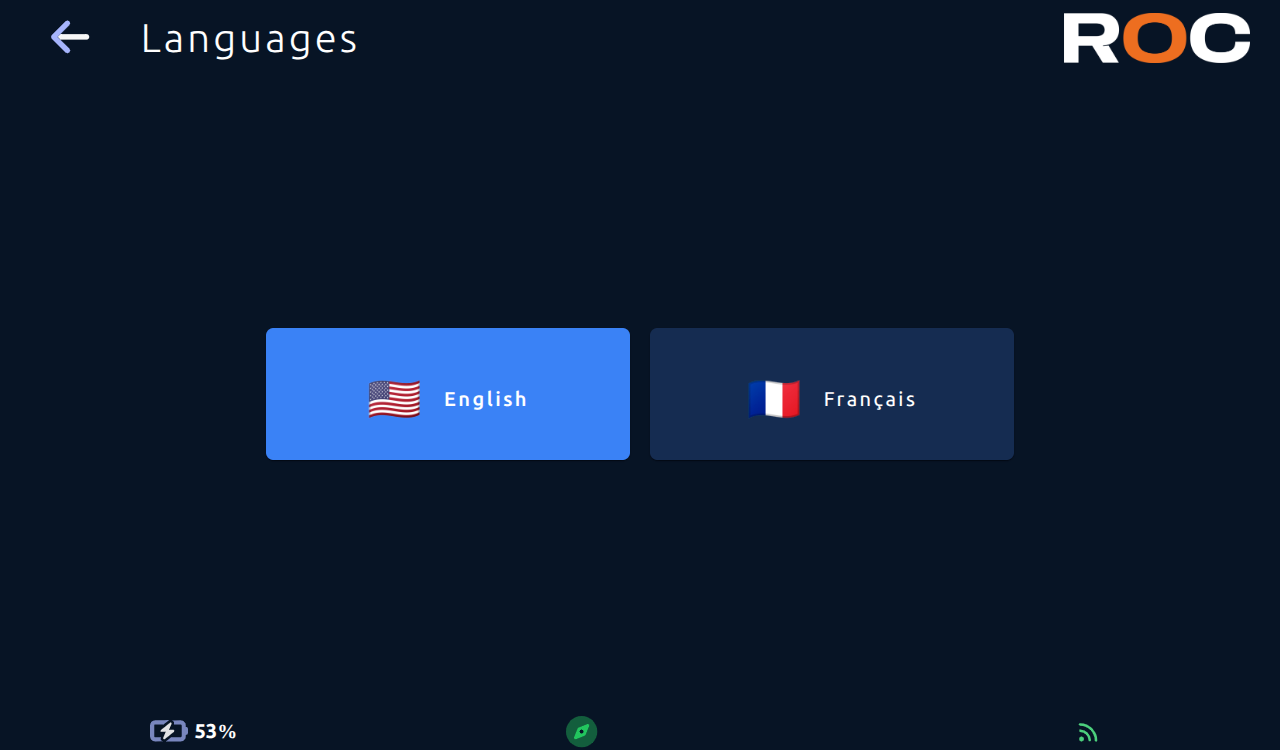
This page lets you choose the application language.
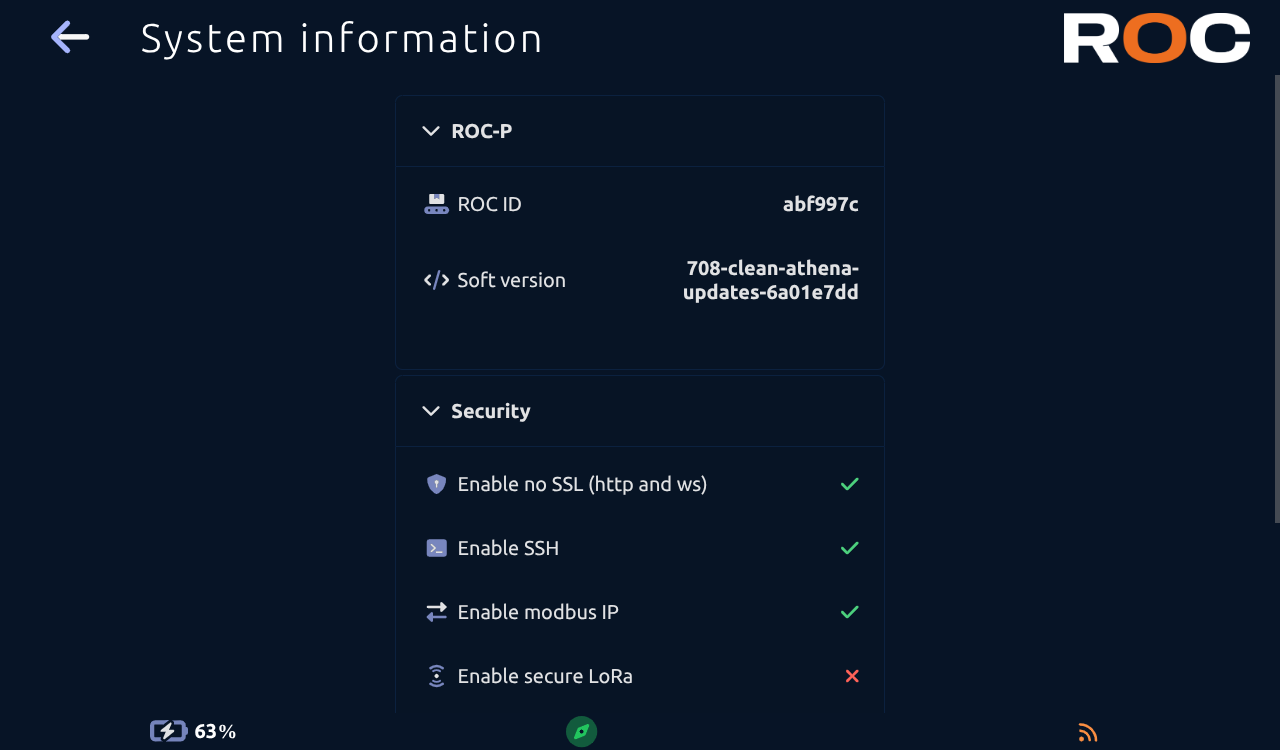
Enable no SSL (http and ws): allows you to enable or disable the use of the application and web services without using an SSL certificate.Enable SSH: allows you to enable or disable SSH access.Enable modbus IP: enables or disables the Modbus IP server on the robot.Enable secure LoRa: allows you to enable or disable the security of messages sent over LoRa by adding encryption and integrity checks. Enabling this feature may result in slower system responsiveness. Please note: if this option is enabled, it must also be enabled on all other devices (manager, robots, buttons, controllers).Connection max try: number of connection attempts allowed for an IP address before it is banned for a certain period of time.Ban period: period in minutes during which an IP address is banned in the event of a connection error.
Sounds
This page allows you to configure the wait sounds at locations on the robot's map and to set up the vehicle's sound scenarios.
Waiting sounds
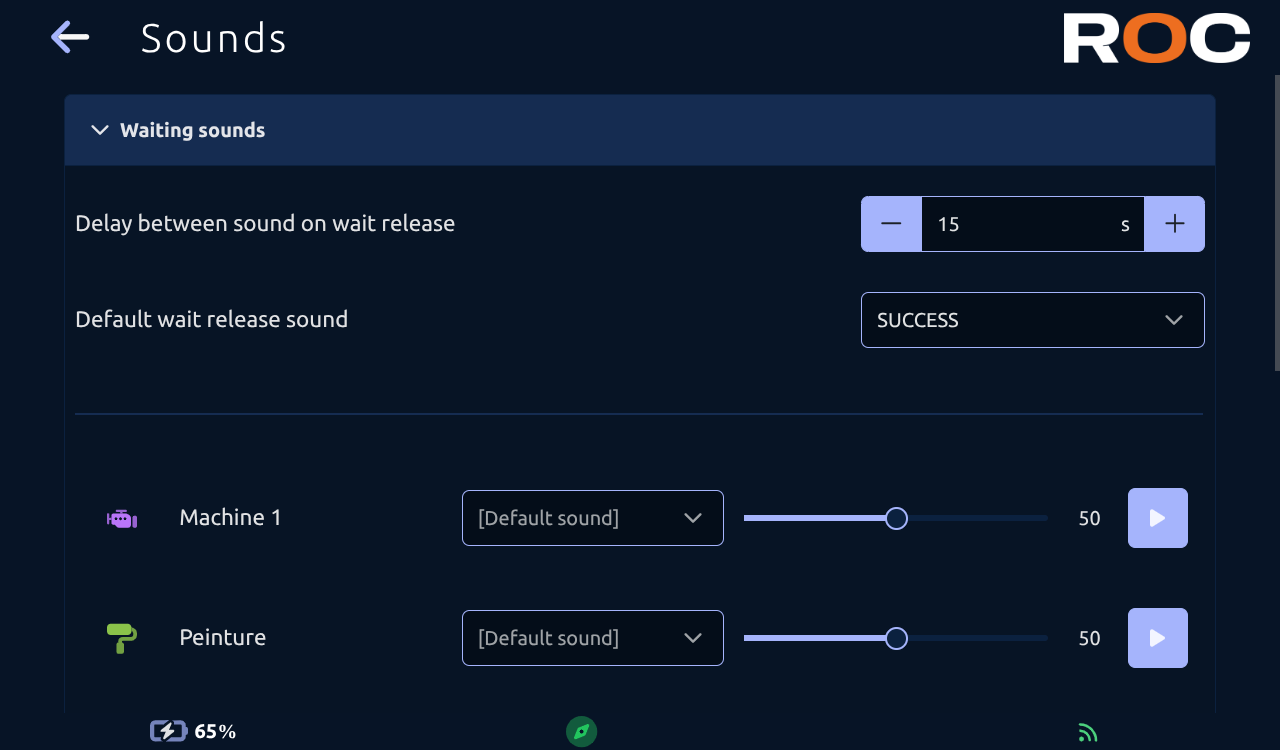
This page allows you to set a sound and a volume for the waiting state for each position on the map.
You can also configure the following:
Delay between sound on wait release: delay between sounds when the robot is waiting at a position.Default wait release sound: sound played by the robot when it is waiting at a position where the waiting sound has not been customized.
Scenarios sounds
This page lets you set a maximum volume for each scenario of sounds emitted by the vehicle.
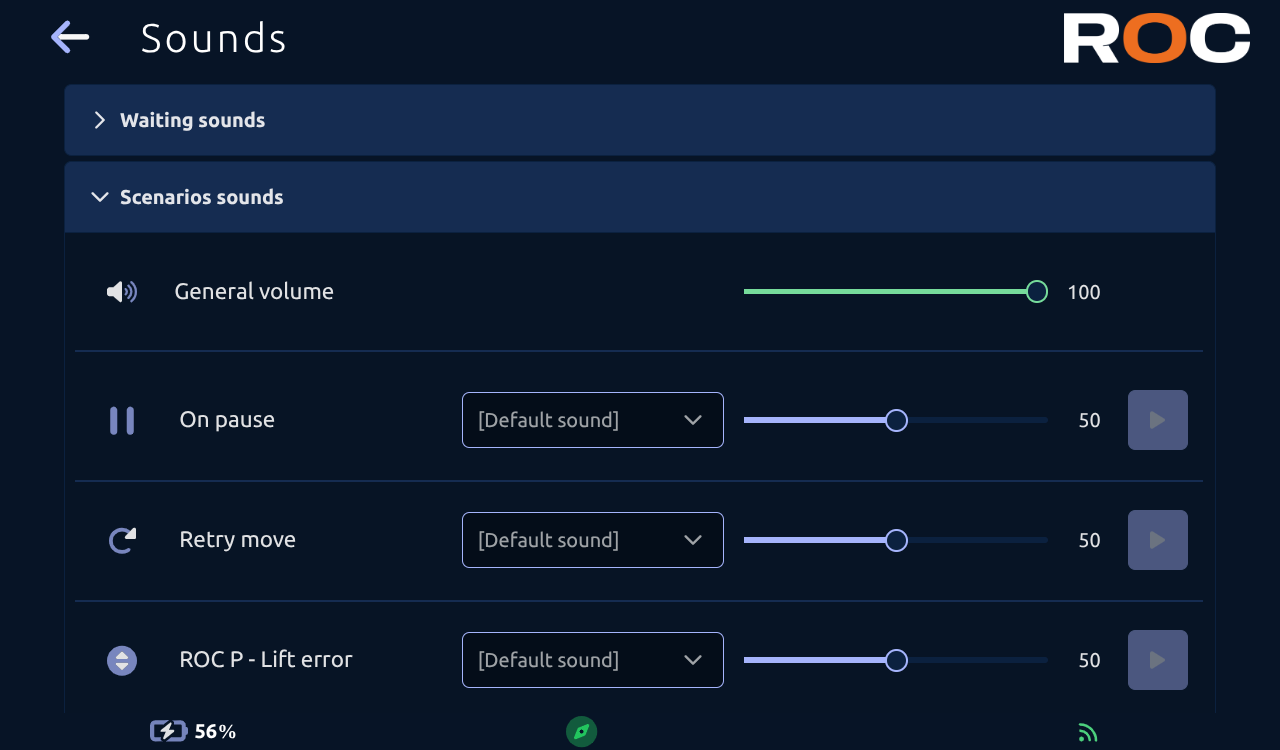
The general volume acts as an upper limit for all other values. If set to 30, other volumes cannot exceed 30.
The following scenarios can be configured:
On Pause: Sounds played when the vehicle is paused during its mission.Retry move: Sounds played when the robot retries a movement after an error.ROC P - Lift error: Sounds played when an error occurs in the robot's Picker module.Init vehicle: Sounds when the vehicle is started.Hotspot connection: Sounds emitted when a device is connected to the vehicle's WiFi hotspot.HIR: Sounds emitted when the vehicle is expecting human intervention (Intervention Humaine Requise).Obstacle: Sounds emitted when the vehicle detects an obstacle while traveling.Safety disabled: Sounds emitted when safety disabled on docking.Special behavior: Sounds emitted when the vehicle is in a particular state.Autopilot: Sounds emitted during the steps of sounds in a sequence of the vehicle's autopilot mode.Areas: Sounds emitted when the vehicle enters, exits or is in a custom area in which sound behaviors have been configured.
Select map
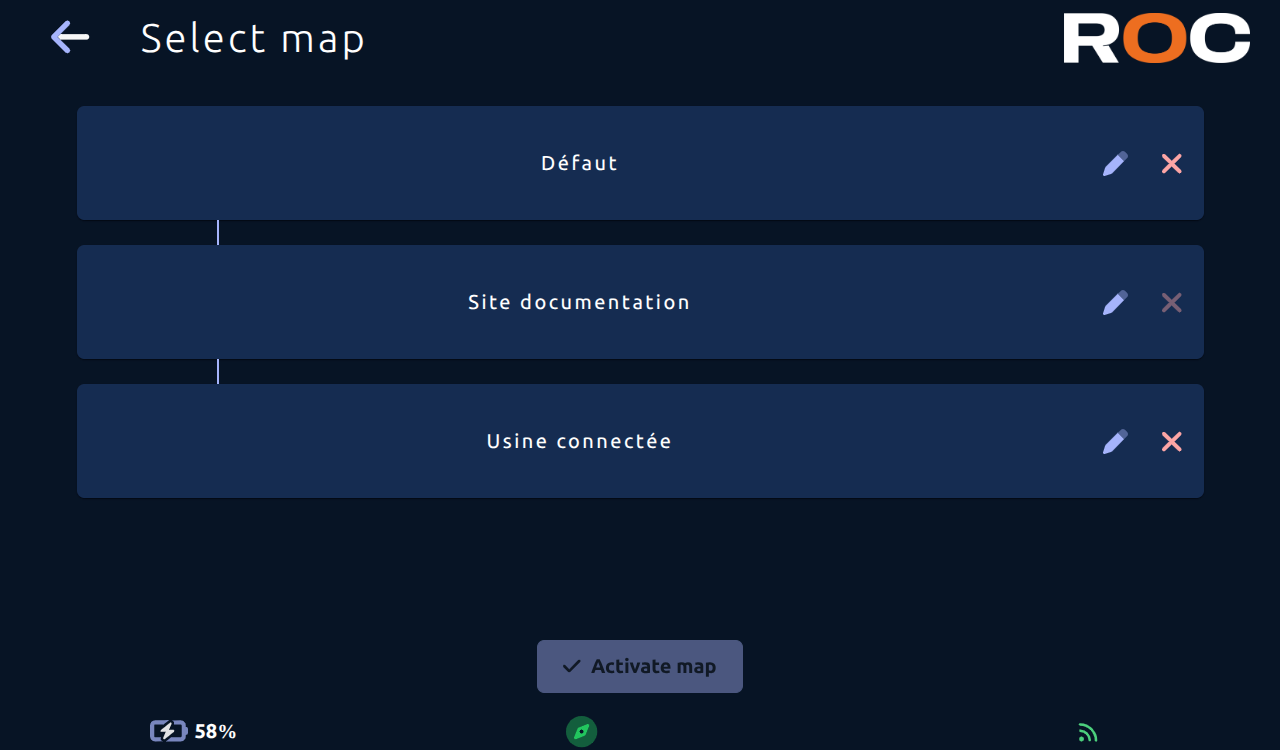
This page allows you to change the vehicle's active map 🗺️ among the maps created or imported on the vehicle.
It also allows renaming and deleting sites, as well as renaming and deleting maps.
In this "tree" view, the sites (containing the maps) are visible on the left side of the tree, and the maps, their names, and their previews are located under the parent site.
The pencil button ✏️ allows you to modify the name and description of a site. The trash button 🗑️ allows you to delete, with confirmation required.
It is not possible to delete the active site or the active map.
Once the selection is complete, the button at the bottom of the page allows you to initiate the map change.
The vehicle will start by replacing its active map, then it will perform a relocation to start autonomous navigation on its new map.
Import / Export
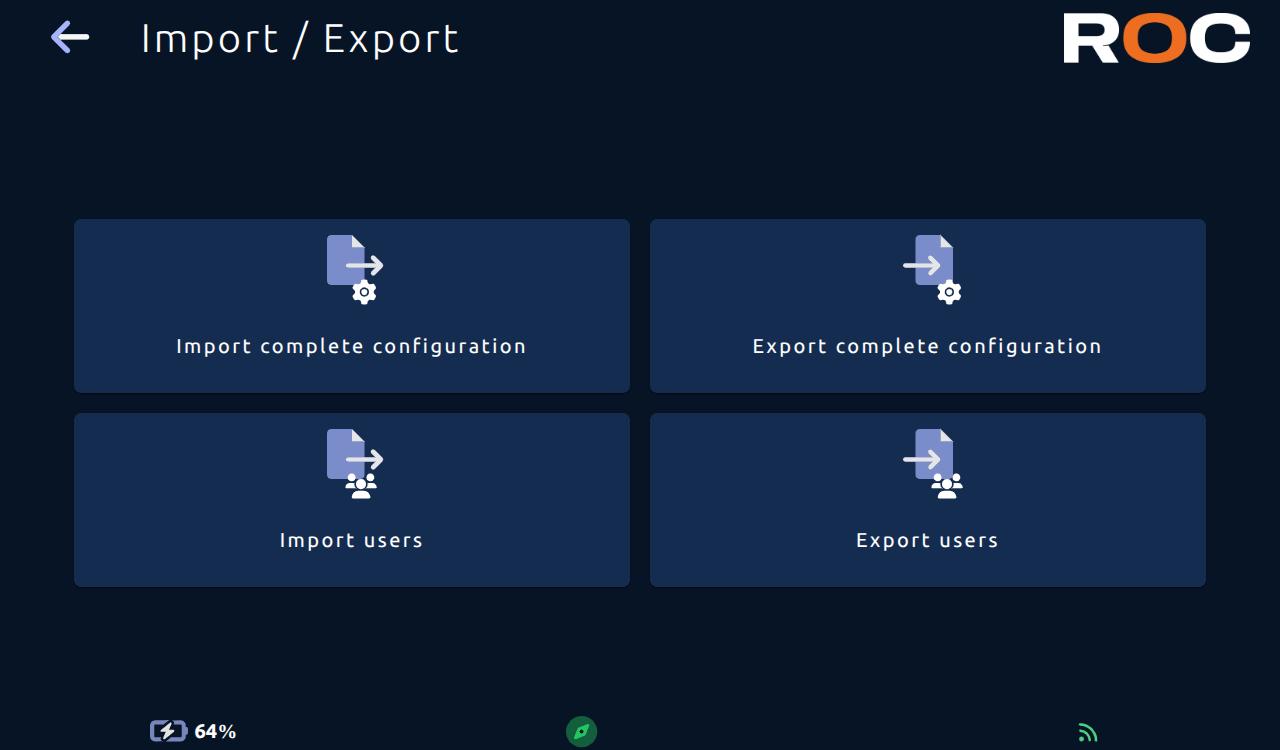
This page allows you to import and export complete configurations (mission settings: buttons, map, IoT controllers, etc.) and user account configurations.
Export: Click the “Export” button to download the configurations (to save them or to import them to another robot or manager).
Import: Click the “Import” button, then select the file to import.
Security logging
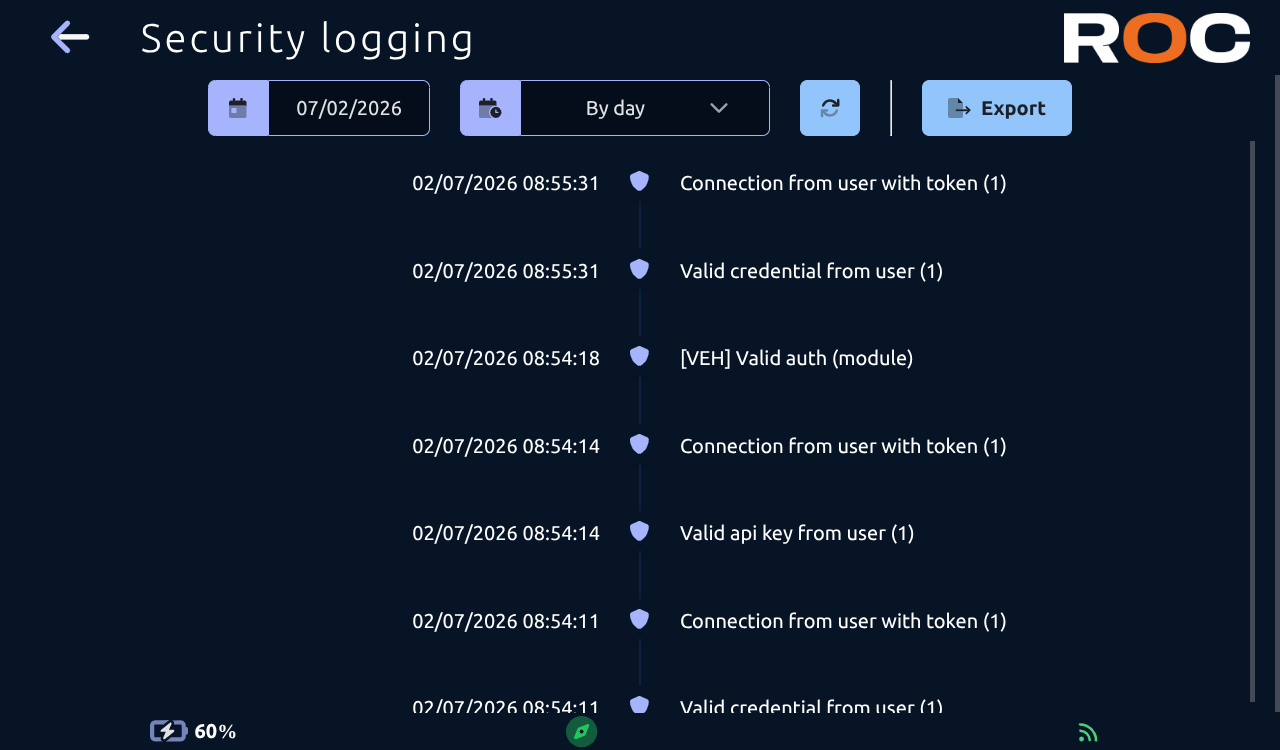
This page allows you to view and export security-related log entries (logins, bans, attempts to open chassis, etc.).
You can select a date and time range; click the “Refresh” button to view the selected range.
Export: Click the “Export” button to download all security-related log entries.
Connectivity
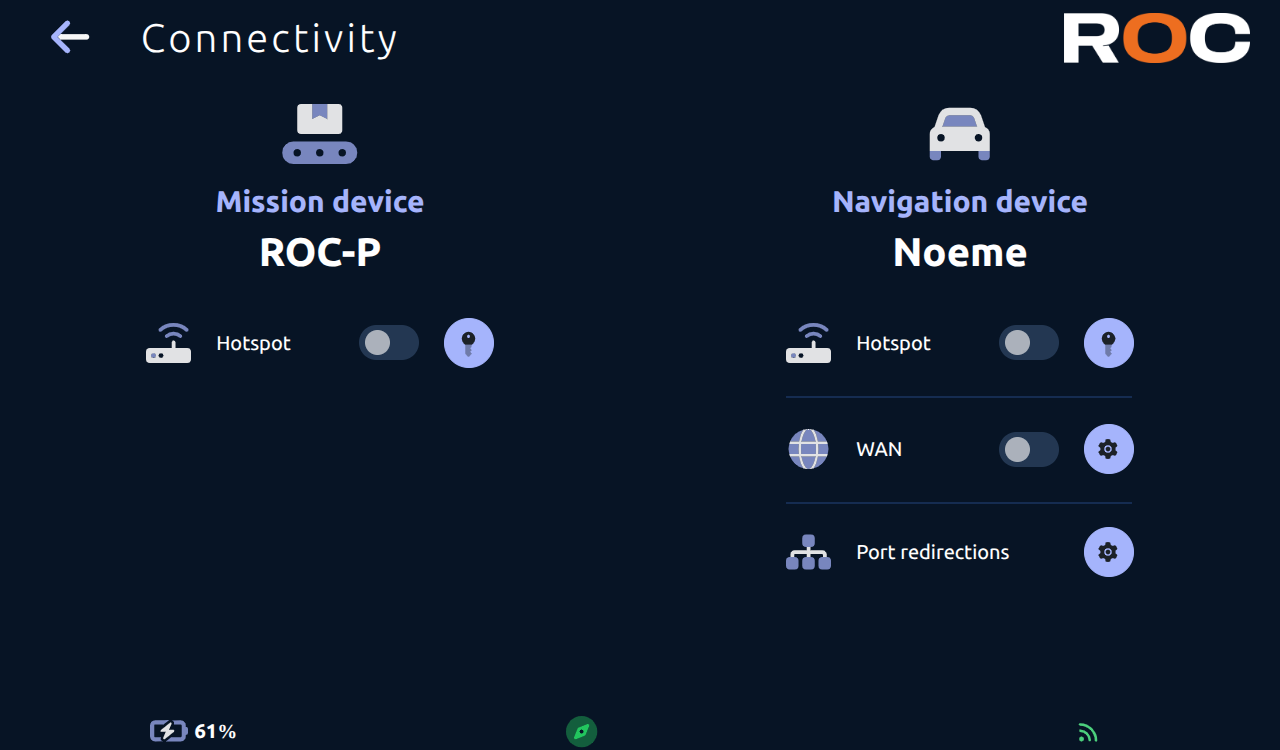
This page allows you to enable, disable, and configure the various Wi-Fi features for the ROC-E/ROC-M and Noeme.
For vehicles, this page also provides access to the port forwarding configuration.
Port redirections
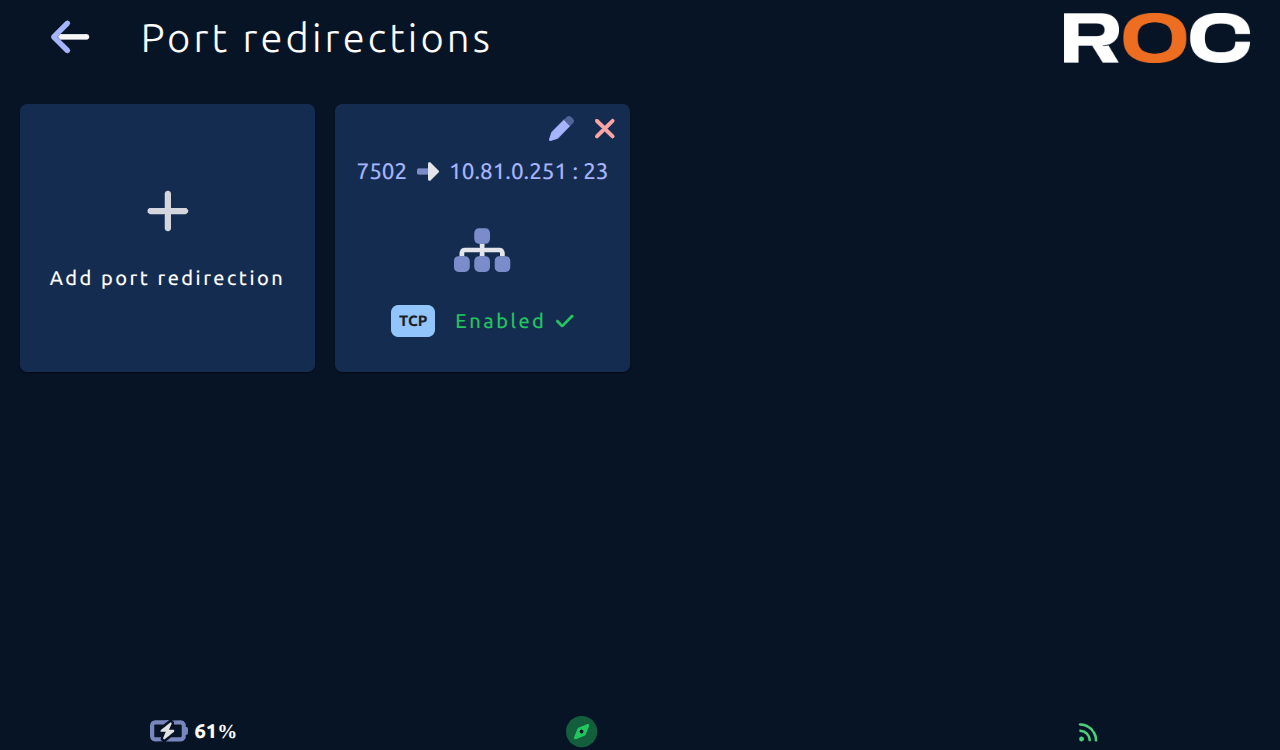
This page lets you enable, disable and configure vehicle port forwarding to other device.
If you connect a device to the vehicle's wired network and it is connected to your WiFi network, port forwarding allows you to access your equipment via your WiFi network and a port forwarding configured on the robot.
Software updates
This page allows you to view and update the ROC-E/ROC-M and Noeme software.
You can enable or disable automatic software updates. As soon as a new update is available, the vehicle will install it once it is docked at its charging station. The ROC-M manager will install it as soon as its mission lists are empty.
If an update is available, the Force Update button allows you to apply it to the relevant equipment.
System information
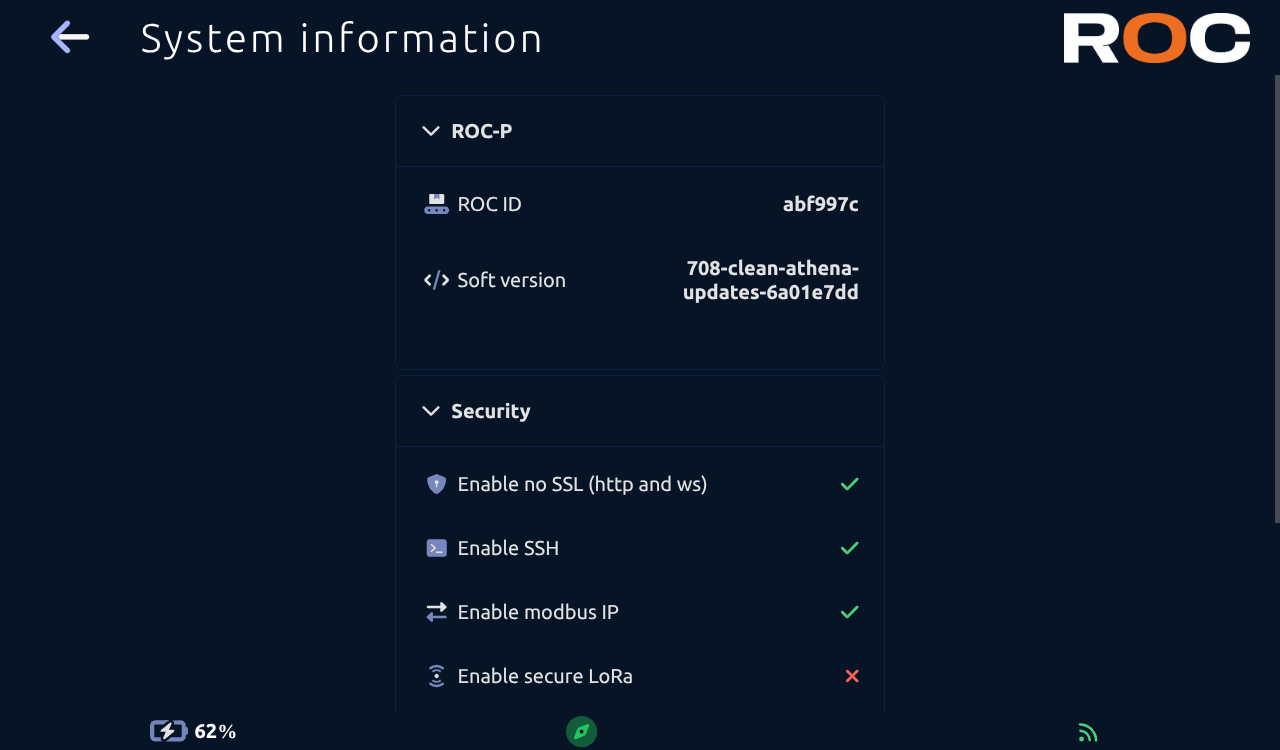
This page allows you to view system information:
The software version and its ID.
The security settings that are in effect.
Noeme system information.
User accounts
This page allows you to add, edit, or delete a user account.
Several user roles are available under the name RBAC(Role-Based Access Control):
Operation
Supervision
Configuration
Administration
These roles grant access to varying numbers of menus and functions within the system.
Mon compte
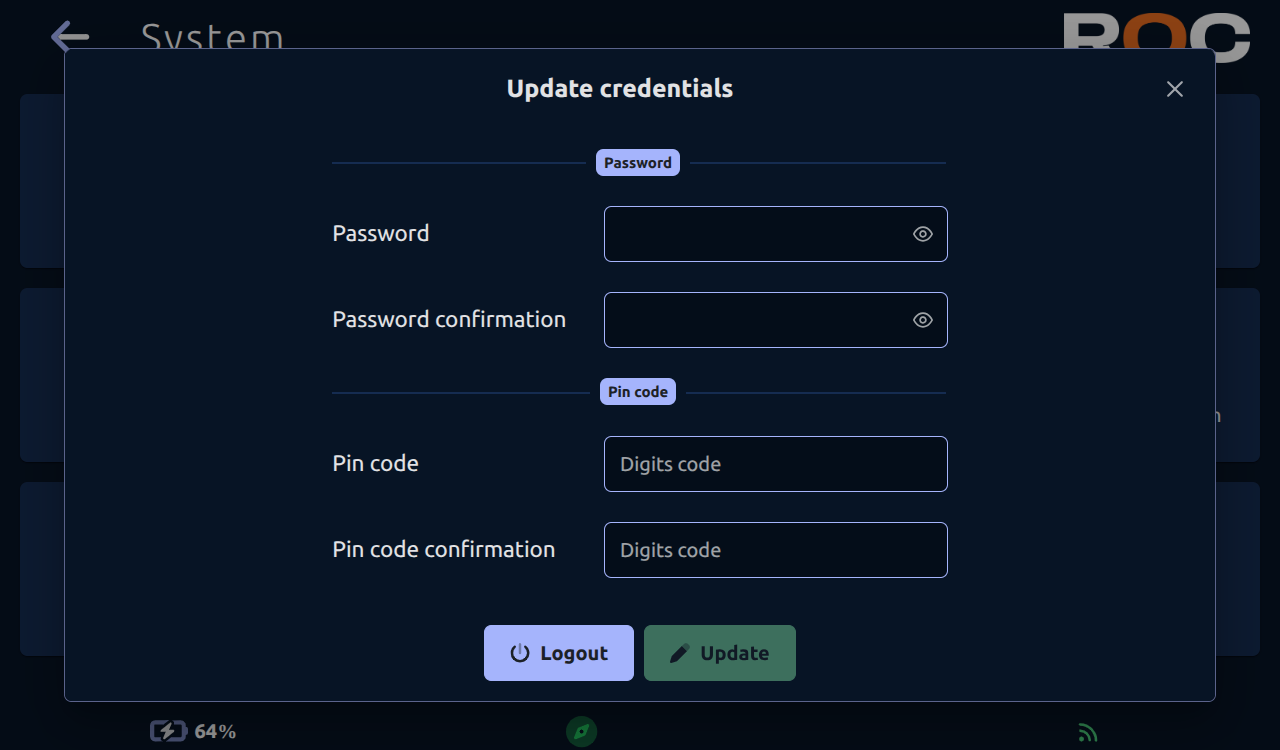
This page allows you to change your password and/or PIN.
You can also log out.
Refresh
Click this button to force a complete page refresh.
This action may be useful after an application update.
Restart
Click on this button to completely restart the application and return it to its start-up state.
Maintenance mode
Click this button to activate or deactivate maintenance mode.
This button is only visible on a manager, and is used to pause the system.
If maintenance mode is enabled, the button icon will be orange.
Statistics
The statistics page gives you access to a set of graphs and heatmaps showing how the solution is working.
The Export button lets you export the application's raw data to generate your own usage statistics.
Home
Provides an overview of solution usage.
A filter system lets you select the date and period of data analyzed.
Calls
Allows you to view a set of graphs on calls made to the solution.
Destinations
Provides statistics on the most popular destinations, as well as a heatmap.
Delays
Allows you to consult statistics on intervention times on the solution:
Travel time
Assistance in the event of a problem
Release time
Movement error
View statistics on displacement errors and a heatmap to see where problems occur.
HIR
View statistics on HIR (Human Intervention Required) errors and a heatmap to see where problems occur.
Missions
The "missions" page is only available to managers.
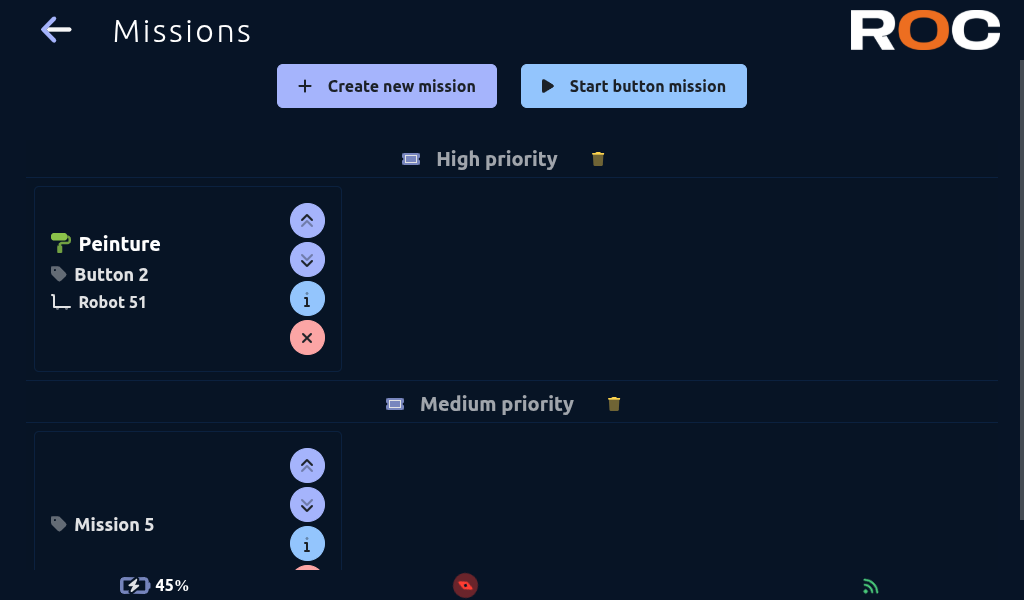
It allows you to consult the list of current missions and to create new missions.
Creating a new mission
Create new mission
By clicking on the "Create new mission" button, you can create a new customized mission to send to the robots.
Step 1: choose between a multidestination mission or an ordered multidestination mission.
Step 2: choose destinations.
Step 3: choose the type(s) of module(s) authorized for this mission (if you don't select a module, they will all be authorized).
Step 4: choose one or more robots authorized for this mission (if you don't select any robot, they will all be authorized, if you select only one robot, the mission will be directly assigned to it).
Mission lists
The first list shows the high-priority missions.
The second list shows the medium-priority missions.
The system can handle up to 10 priority levels.
A mission will move up one priority level if the first robot is unable to complete it (as soon as another robot becomes available, it will take on that mission as a priority).
Mission
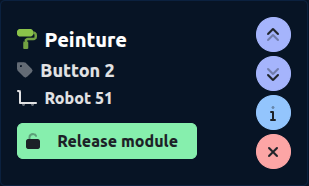
Basic information is displayed:
Active mission stage and destination.
Mission number or associated button.
The robot assigned to the mission.
4 interaction buttons are available:
Increase the mission priority by one level.
Decrease the mission priority by one level.
View mission details.
Cancel the mission.
Mission details
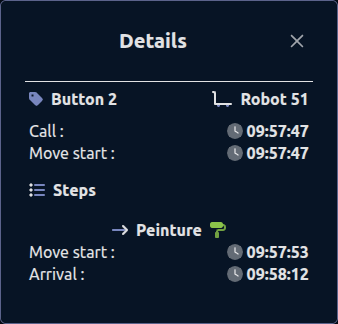
This popup allows you to view the mission details with all its steps.
Release a robot
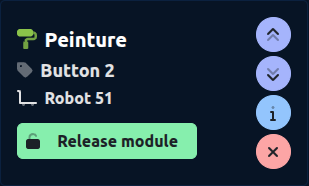
When a robot is waiting to be released, the "Release robot" button appears.
This button lets you release the robot so that it can move on to its next step, or return to charge if its mission has been completed.
Extend a mission
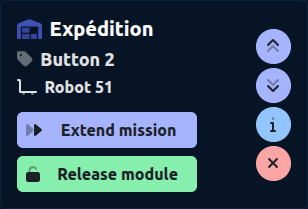
When a robot is waiting to be released and has completed its mission, the "Extend mission" button is displayed.
This button lets you specify the next steps in the robot's mission.
The robot will be automatically released when it receives these new steps.