LoRa controllers user manual
Principle
LoRa controllers are equipped with 2 relays and 8 dry contacts. They can be used to control equipment or be controlled by equipment/sensors.
LoRa controllers must be connected to a power supply between 12V and 24V DC.
LoRa controllers should be installed on a DIN rail.
Views
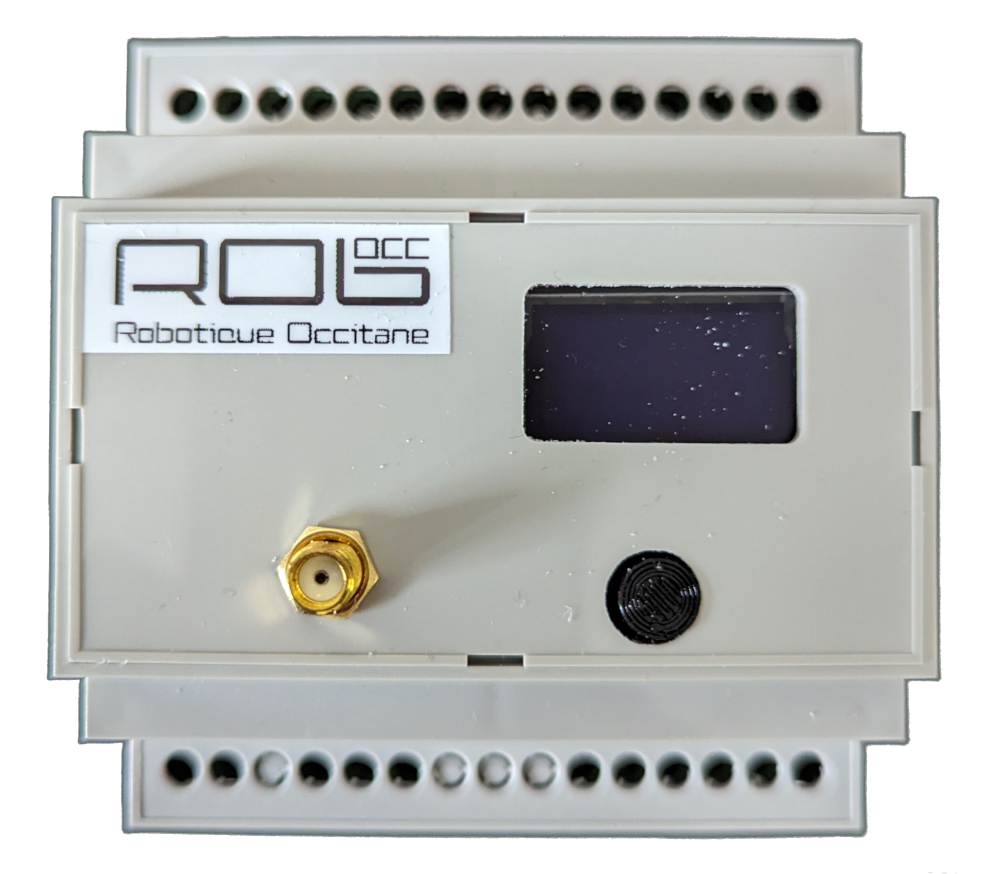
Front view
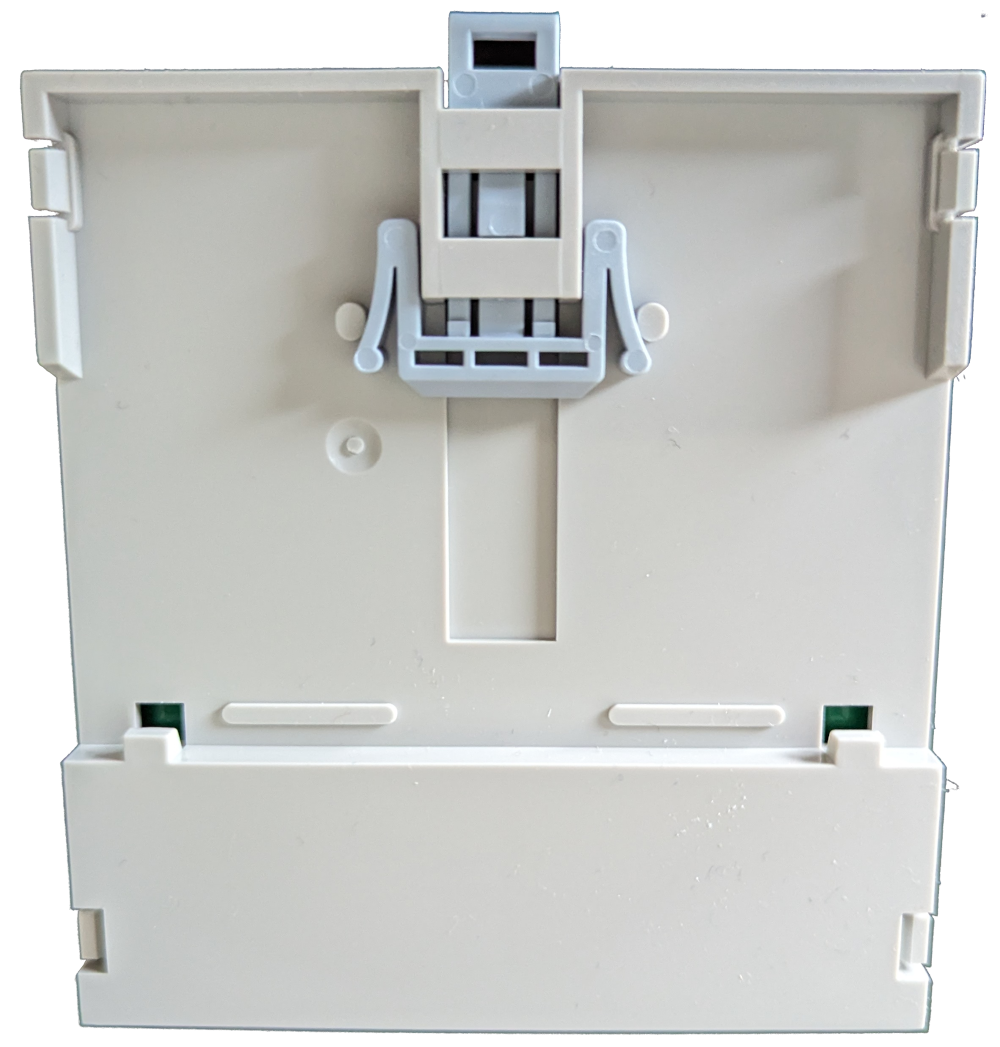
Rear view
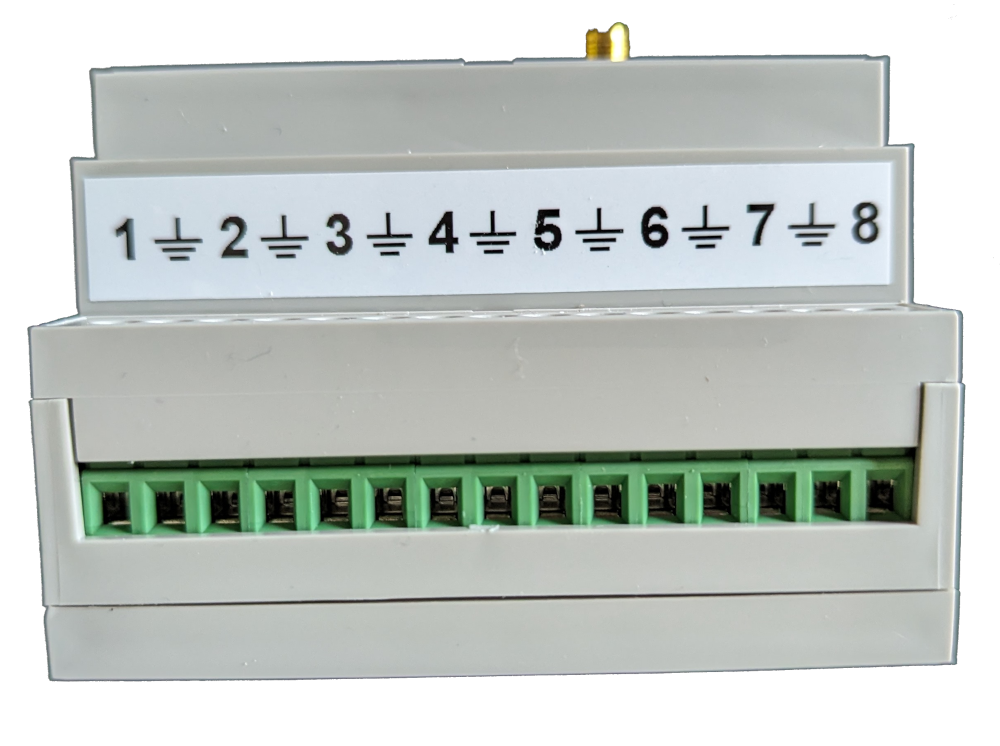
Top view
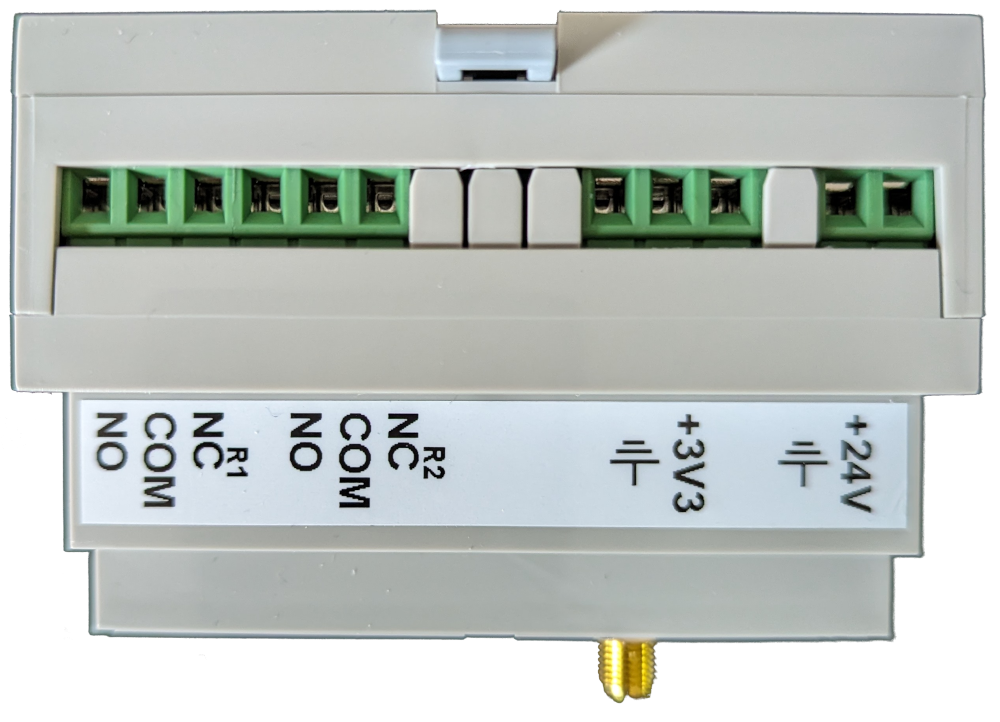
Bottom view
Configuration
Press and hold the button for 2 seconds to access the menu.
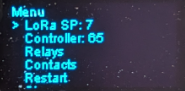
Menu
Quickly press the physical button to change menu, long press to enter menu.
Menu
LoRaControllerRelaysContactsRestart: restart the controller, to be done after a modification.Close: o close the menu.
LoRa
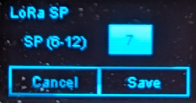
This page is used to configure the controller's SP.
The SP must be set to the same SP as the manager and robots.
Quickly press the physical button to change a value or validate a button, long press to change fields or buttons.
Controller
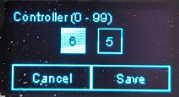
Unique controller identifier between 1 and 99.
It must be unique and will be configured on the manager and robots.
Quickly press the physical button to change a value or validate a button, long press to change fields or buttons.
Relays
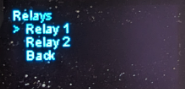
Allows you to modify the relay activation time on a pulse command in tens of milliseconds and test relays.
Quickly press the physical button to change menu, long press to enter menu.
Relay
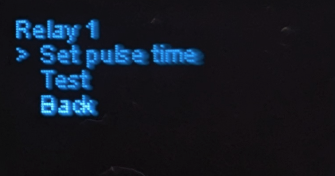
Once on a relay page :
Pulse: set the pulse duration,Test: test the relay,Back: return to the previous page.
Relay - Set pulse time

Once on the page, press the physical button quickly to change a value or validate a button, and press and hold to change fields or buttons.
Relay - Test
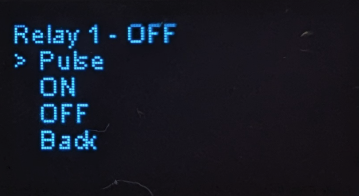
This page allows you to :
Set pulse time: send a pulse to the relayON: activate the relayOFF: deactivate the relay
The active state of the relay is shown at the top of the page.
Contacts

Allows you to modify contact configuration.
Quickly press the physical button to change menu, long press to enter menu.
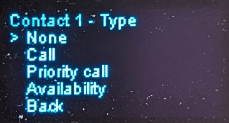
Contact
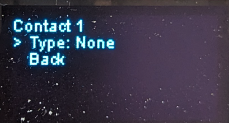
Once on a contact's page, you can choose its type:
None: no configurationCallPriority callAvailability
Contact Call / Priority call
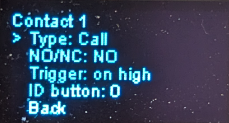
If the contact type is Call or Priority call, new configurations are available:
NO/NC: indicate whether the contact is normally open or closed.Trigger: indicate whether the call should be triggered on an impulse or when the contact is "high".
In the case of "high" contact configuration, if the status changes to "low", the call will be cancelled.
The "high" configuration is generally used for presence contacts.on highon pulse
ID button: Identifier of the button used to generate the call.
Contact Availability
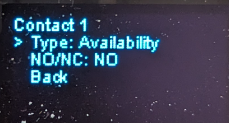
If the contact type is Availability, a new configuration is available:
NO/NC: indicate whether the contact is normally open or closed.