Advanced settings
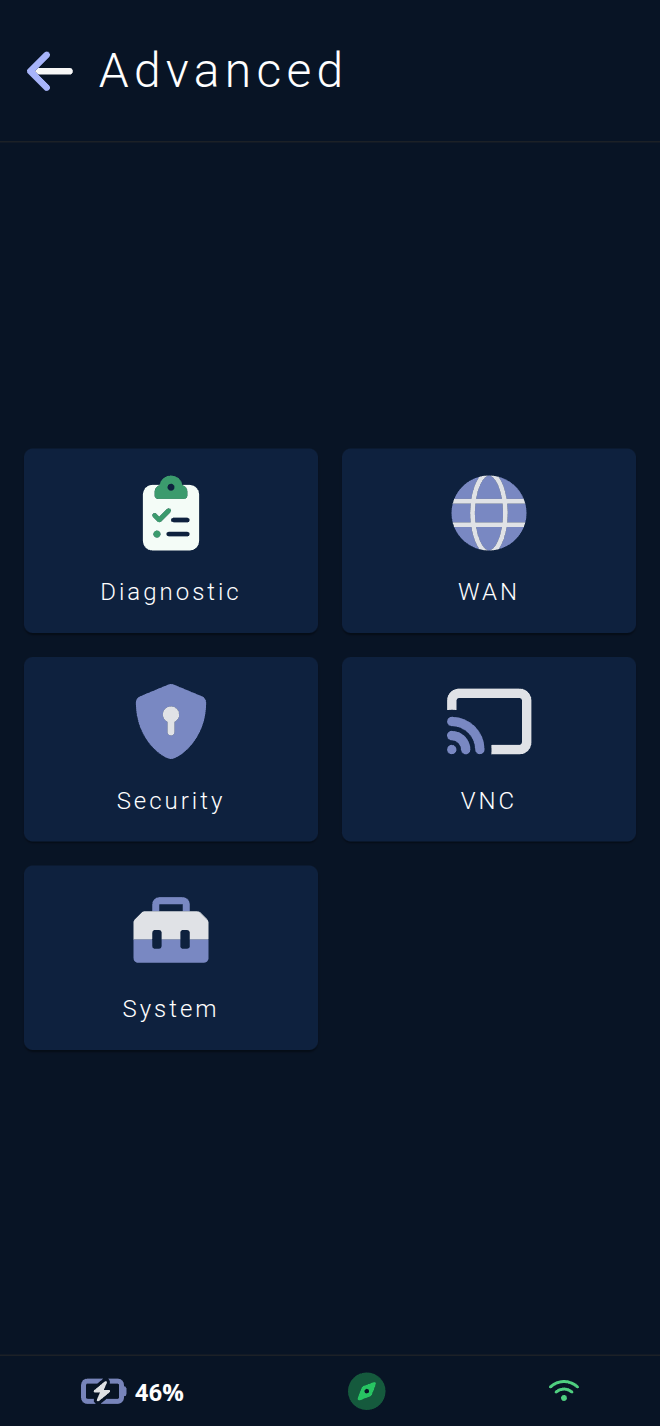
The Advanced parameters menu provides access to other vehicle operating parameter pages.
Vehicle diagnostics 📋.
Management of the vehicle's external connection 🌐.
The security 🛡️ management page for connecting to the robot.
The advanced maintenance page 🖥️ for the Rob'Occ team.
The advanced system tools page 🧰, including reset to factory settings.
Note : The diagnostic icon will be lit in red if an internal error is in progress.
The external connection icon 🌐 will be lit in green if the vehicle has an external connection configured, and gray if this feature has been disabled.
Diagnostic
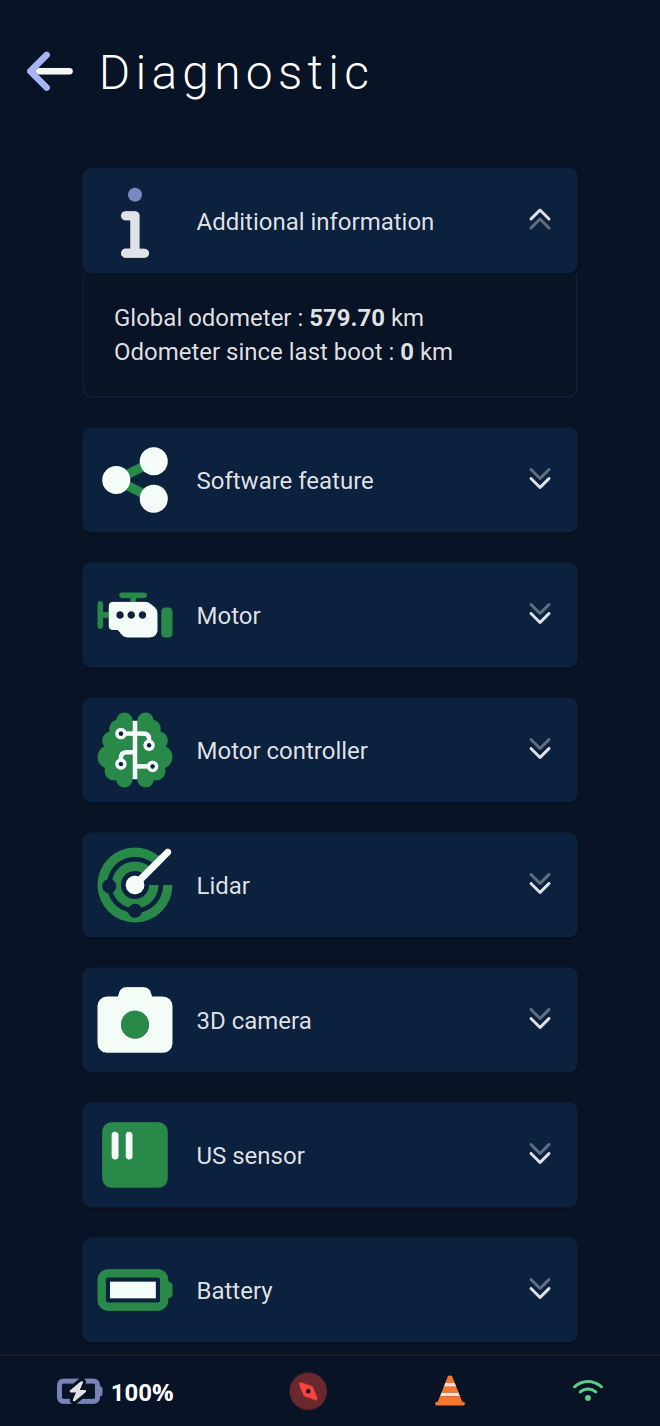
This page shows the status of the vehicle's various components and software bricks 📋 as well as the vehicle's mileage information.
The first section shows the vehicle's overall odometer 🚗, as well as the number of kilometers traveled since the vehicle's last startup
All components and software packages are listed in green ✅ if the vehicle has no issues.
Opening a category reveals the list of components within it.
In case of an internal error, the listing is replaced with a list of faulty components and/or software modules 🟥.
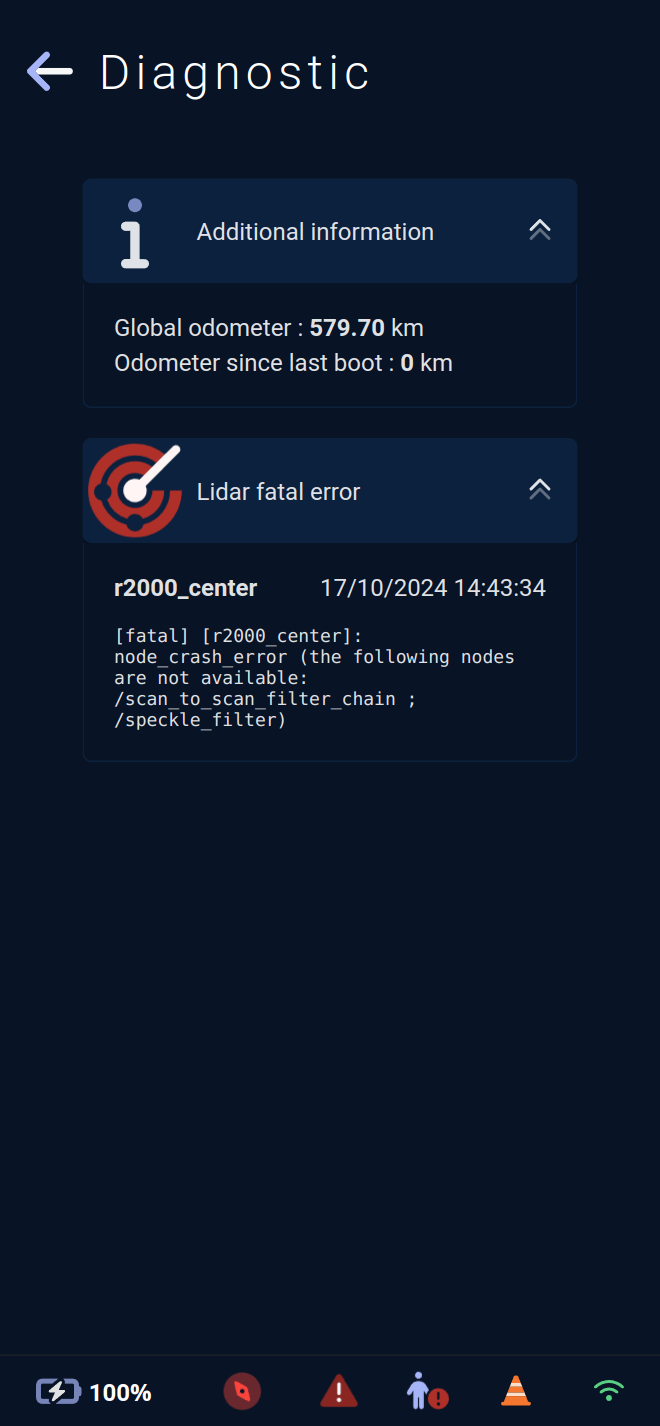
Details of the error are provided, showing the affected component and the time when the error occurred.
A summary of the error is also described, helping the Rob'Occ team understand what happened.
Note : When an internal error occurs, the warning triangle ⚠️ icon in the footer allows direct access to this page.
External connection configuration
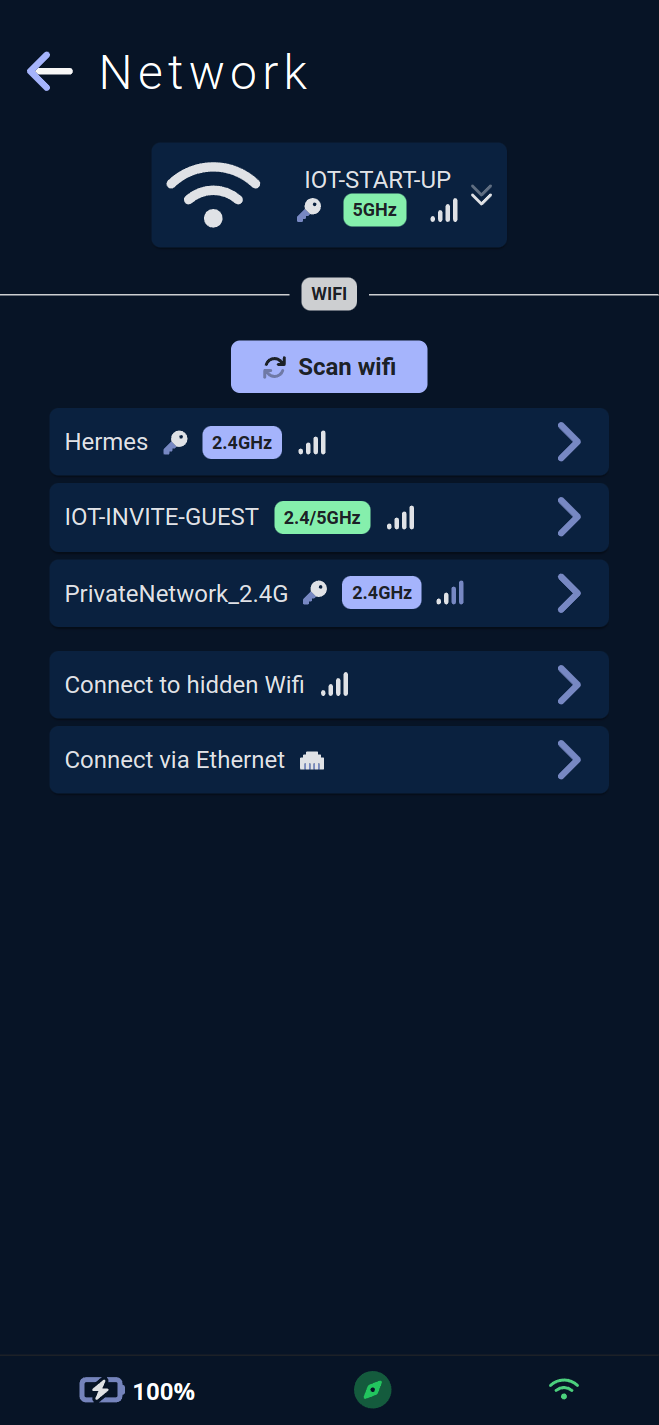
This page allows configuring the external connection of the vehicle.
The badge at the top of the page summarizes the status of the external connection, displaying a WiFi icon 🛜 or Ethernet icon based on the WAN configuration.
For WiFi connection 🛜 , a key icon 🔑 indicates if the WiFi network is secure, a 5Ghz or 2.4Ghz badge denotes its frequency, and an antenna bars icon 📶 shows the signal strength.
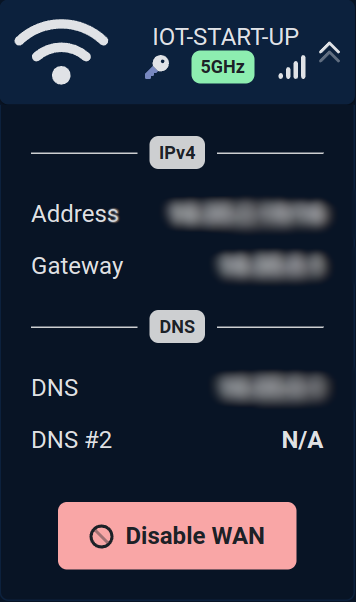
Opening it reveals additional network information (IPv4, DNS) and a button 🚫 to disable the external connection.
⚠️ Disabling the external connection will make the vehicle reachable only via the hotspot or through the module, and will prevent any remote maintenance.
A Scan WiFi button lists the WiFi networks detected by the vehicle. Beneath the listing, options to connect the vehicle to a hidden WiFi network or via Ethernet are available.
Note : To use WiFi connection externally 🛜 , the vehicle needs its WiFi USB key to be plugged in.
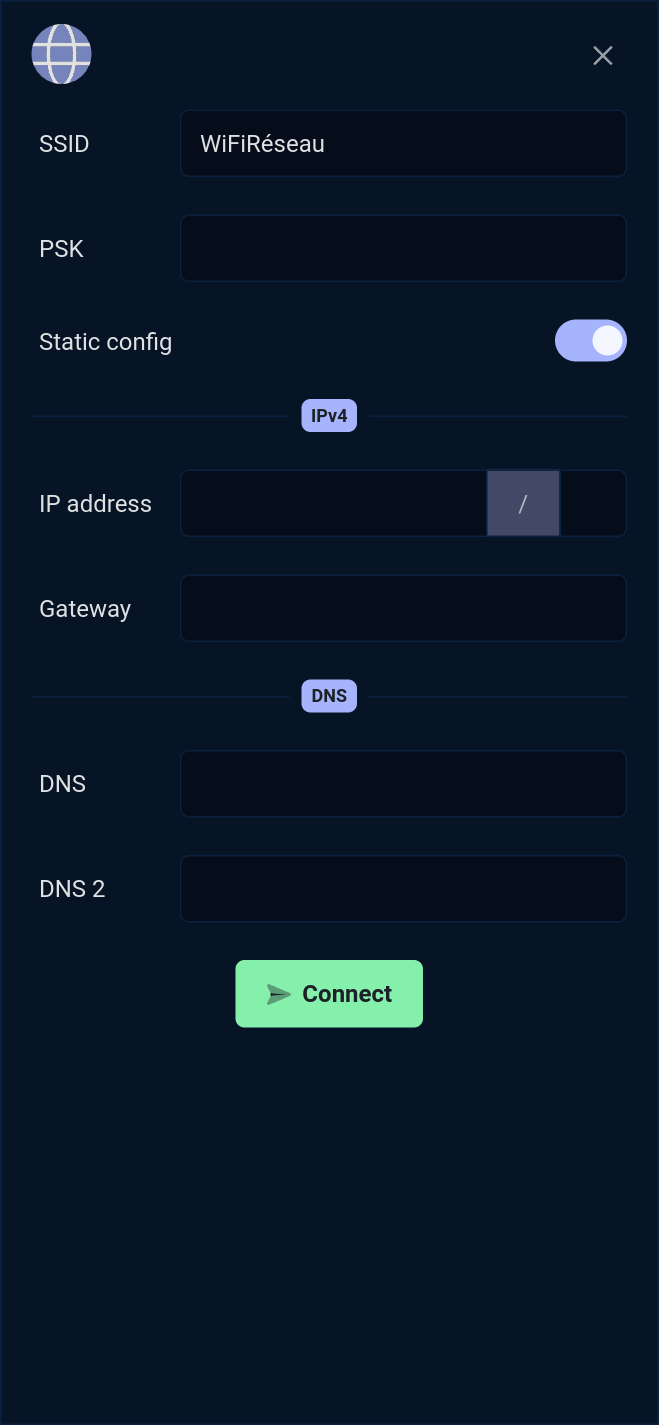
Once a WiFi network is selected, a form to connect to it will appear. The pre-shared key (WiFi network password) is required, and a checkbox allows specifying network rules (IPv4, DNS) if necessary.
System
This page allows you to configure fields related to vehicle connection security.
The editable fields are grouped together in the first section as follows:
The first field allows you to enable or disable the unsecured HTTP server and Websocket (enabled by default) by checking the box.
The second field allows you to enable or disable the SSH server (enabled by default), which is used by the Rob'Occ team to take control of the robot and maintain it remotely.
The third field allows you to configure the maximum number of failed connection attempts to the vehicle configuration application default 5.
The fourth field allows you to configure the timeout period before a new connection attempt after reaching the maximum number of errors default 5 min.
The changes will only take effect the next time the vehicle is restarted. A pop-up window to restart the vehicle is located at the bottom of the page.
VNC
This page enables the Rob'Occ team to perform advanced maintenance.
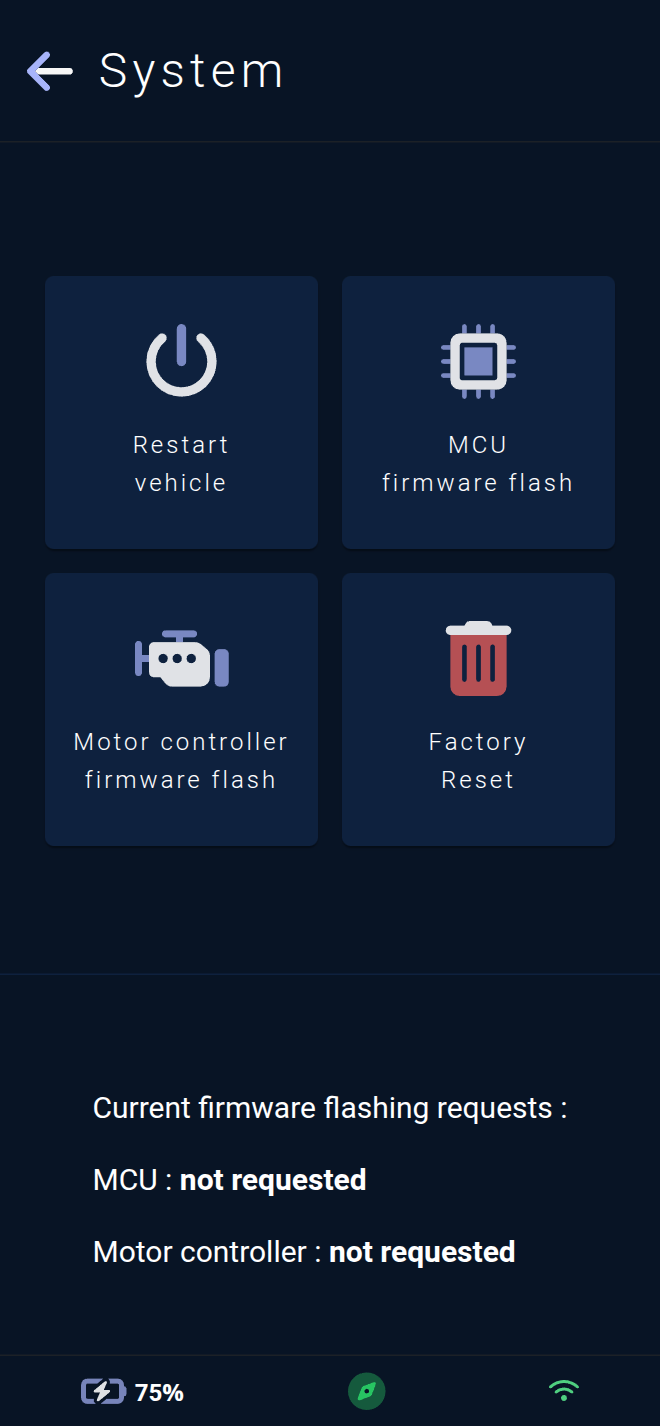
This page allows advanced actions on the vehicle, including restart the vehicle, requesting a flash of certain components, or a reset 🗑️ to factory settings.
The first icon, representing a start logo, opens the restart vehicle pop-up, where three options are available:
Soft: only restarts the vehicle software.Hard: also restarts the container where the vehicle software is launched.Reboot: completely restarts the vehicle's central processing unit.
NB: A pre-checked box allows you to save the vehicle's current position and automatically restart navigation at that position upon restart, which is useful if the vehicle is restarted far from one of these relocation points.
The second icon, representing a computer chip, allows you to request the reprogramming of the microcontroller responsible for LEDs, ultrasonic sensors, sounds, and communication with the vehicle's battery. USE WITH CAUTION ⚠️.
The third icon, representing an engine, allows you to request reprogramming of the engine controller that communicates directly with the vehicle's engines. USE WITH CAUTION ⚠️.
The fourth icon, representing a trash can 🗑️, allows you to reset the vehicle to its factory settings.
This will delete 🗑️ :
all sites and maps created on the vehicle, these being exportable via the
Export sitespage to keep a copy.all settings ⚙️ made on the vehicle (sounds, networks, autopilots...).
all accounts 🧑🔧 created/modified.
Only the mileage will be conserved.
⚠️ Warning: this will automatically log you out of the application, and you will be able to reconnect via the default account and its default password..
A summary of the flash requests can be viewed in the second section. Flash will be carried out the next time the vehicle is restarted.